Baked lemon poppy seed donuts (v+gf)

Vegan + gluten free donuts that taste JUST as good as the real deal! I’m tellin ya, these are delish. Mother’s Day is this weekend and my Lemon Poppy Seed Donuts are the perfect light/healthy sweet treat to make for breakfast or brunch. I love all things lemon and these are just what I want to eat on Mother’s Day morning, preferably brought to me in bed with a cup of coffee! The donuts are baked instead of fried making them much quicker and easier to make. You can even make them the night before so there’s no stress the day of. Super simple, full of flavor & guilt free!

lemon poppyseed 2.jpg

Vegan + GF Lemon Poppy Seed Donuts

Ingredients:

DONUT BATTER:

1/4 cup packed brown sugar

1/4 cup granulated sugar

Zest from 2 lemons

1/4 cup coconut oil, melted

2 Tablespoon Earth Balance vegan butter, melted

1 flax egg (in a small bowl combine 1 Tablespoon ground flax + 2 Tablespoons water, let set for 2 mins)

3/4 cup unsweetened almond, coconut or soy milk

Juice from 1 lemon

1 cup gluten free all purpose flour

1/4 cup almond flour

1/2 teaspoon salt

1/2 teaspoon baking soda

1 teaspoon baking powder

1 1/2 teaspoon pure vanilla extract

1/2 Tablespoon poppy seeds

GLAZE:

1 cup powdered sugar

1 Tablespoons soy creamer (or dairy free milk/cream)

Juice from 1 lemon

Lemon zest, poppy seeds + edible flowers for garnish

Directions:

Preheat your oven to 400 degrees.

In large bowl or mixer fitted with paddle attachment mix melted coconut oil, melted vegan butter, brown sugar, sugar, vanilla extract, flax egg and lemon zest to combine. Add in almond milk (or dairy free milk of your choice) and lemon juice, mix.

In a separate bowl sift together gluten free flour, baking soda, baking powder and salt. Add in almond flour and stir to combine.

Slowly add the dry ingredients into the wet ingredients, then add in the poppy seeds and mix until smooth. Make sure everything is combined and there are no lumps. But do not over mix!

Spray the donut pans with pan spray. Spoon the batter into the donut pans, or using a piping bag, pipe the mixture into the pans just slightly under the rim.

Place into the oven and bake for approximately 20 minutes until slightly golden and the cake springs back when touched.

Remove from oven and let set for a second before turning pans over onto a cooling wrack and popping out the donuts. Let the donuts cool completely before dipping into glaze. For best results allow them to cool before tasting, the texture will develop as the donuts cool.

While your donuts are cooling make the lemon glaze. Place powdered sugar, soy creamer (or dairy free milk) & lemon juice into a small bowl and whisk until smooth. You can add more dairy free cream if the mixture is too thick or more powdered sugar if it is too thin. It should look glossy and be of dipping consistency. Dip your donuts into the glaze and place onto a parchment lined tray.

Once all of the donuts have been dipped you can garnish with lemon zest, poppy seeds & edible flowers. (viola, pansy, nasturtium, marigold, etc)

Let the donuts hang out until the glaze has set (try not to dig in quite yet!)

Store the donuts in an airtight container for 1-2 days.

These donuts are so delicious & perfect Mother’s Day or any day for that matter. Simple to make & almost too pretty to eat! (almost)

Enjoy!

lemon poppyseed 3.jpg

Vegan + GF Carrot Cake Donuts

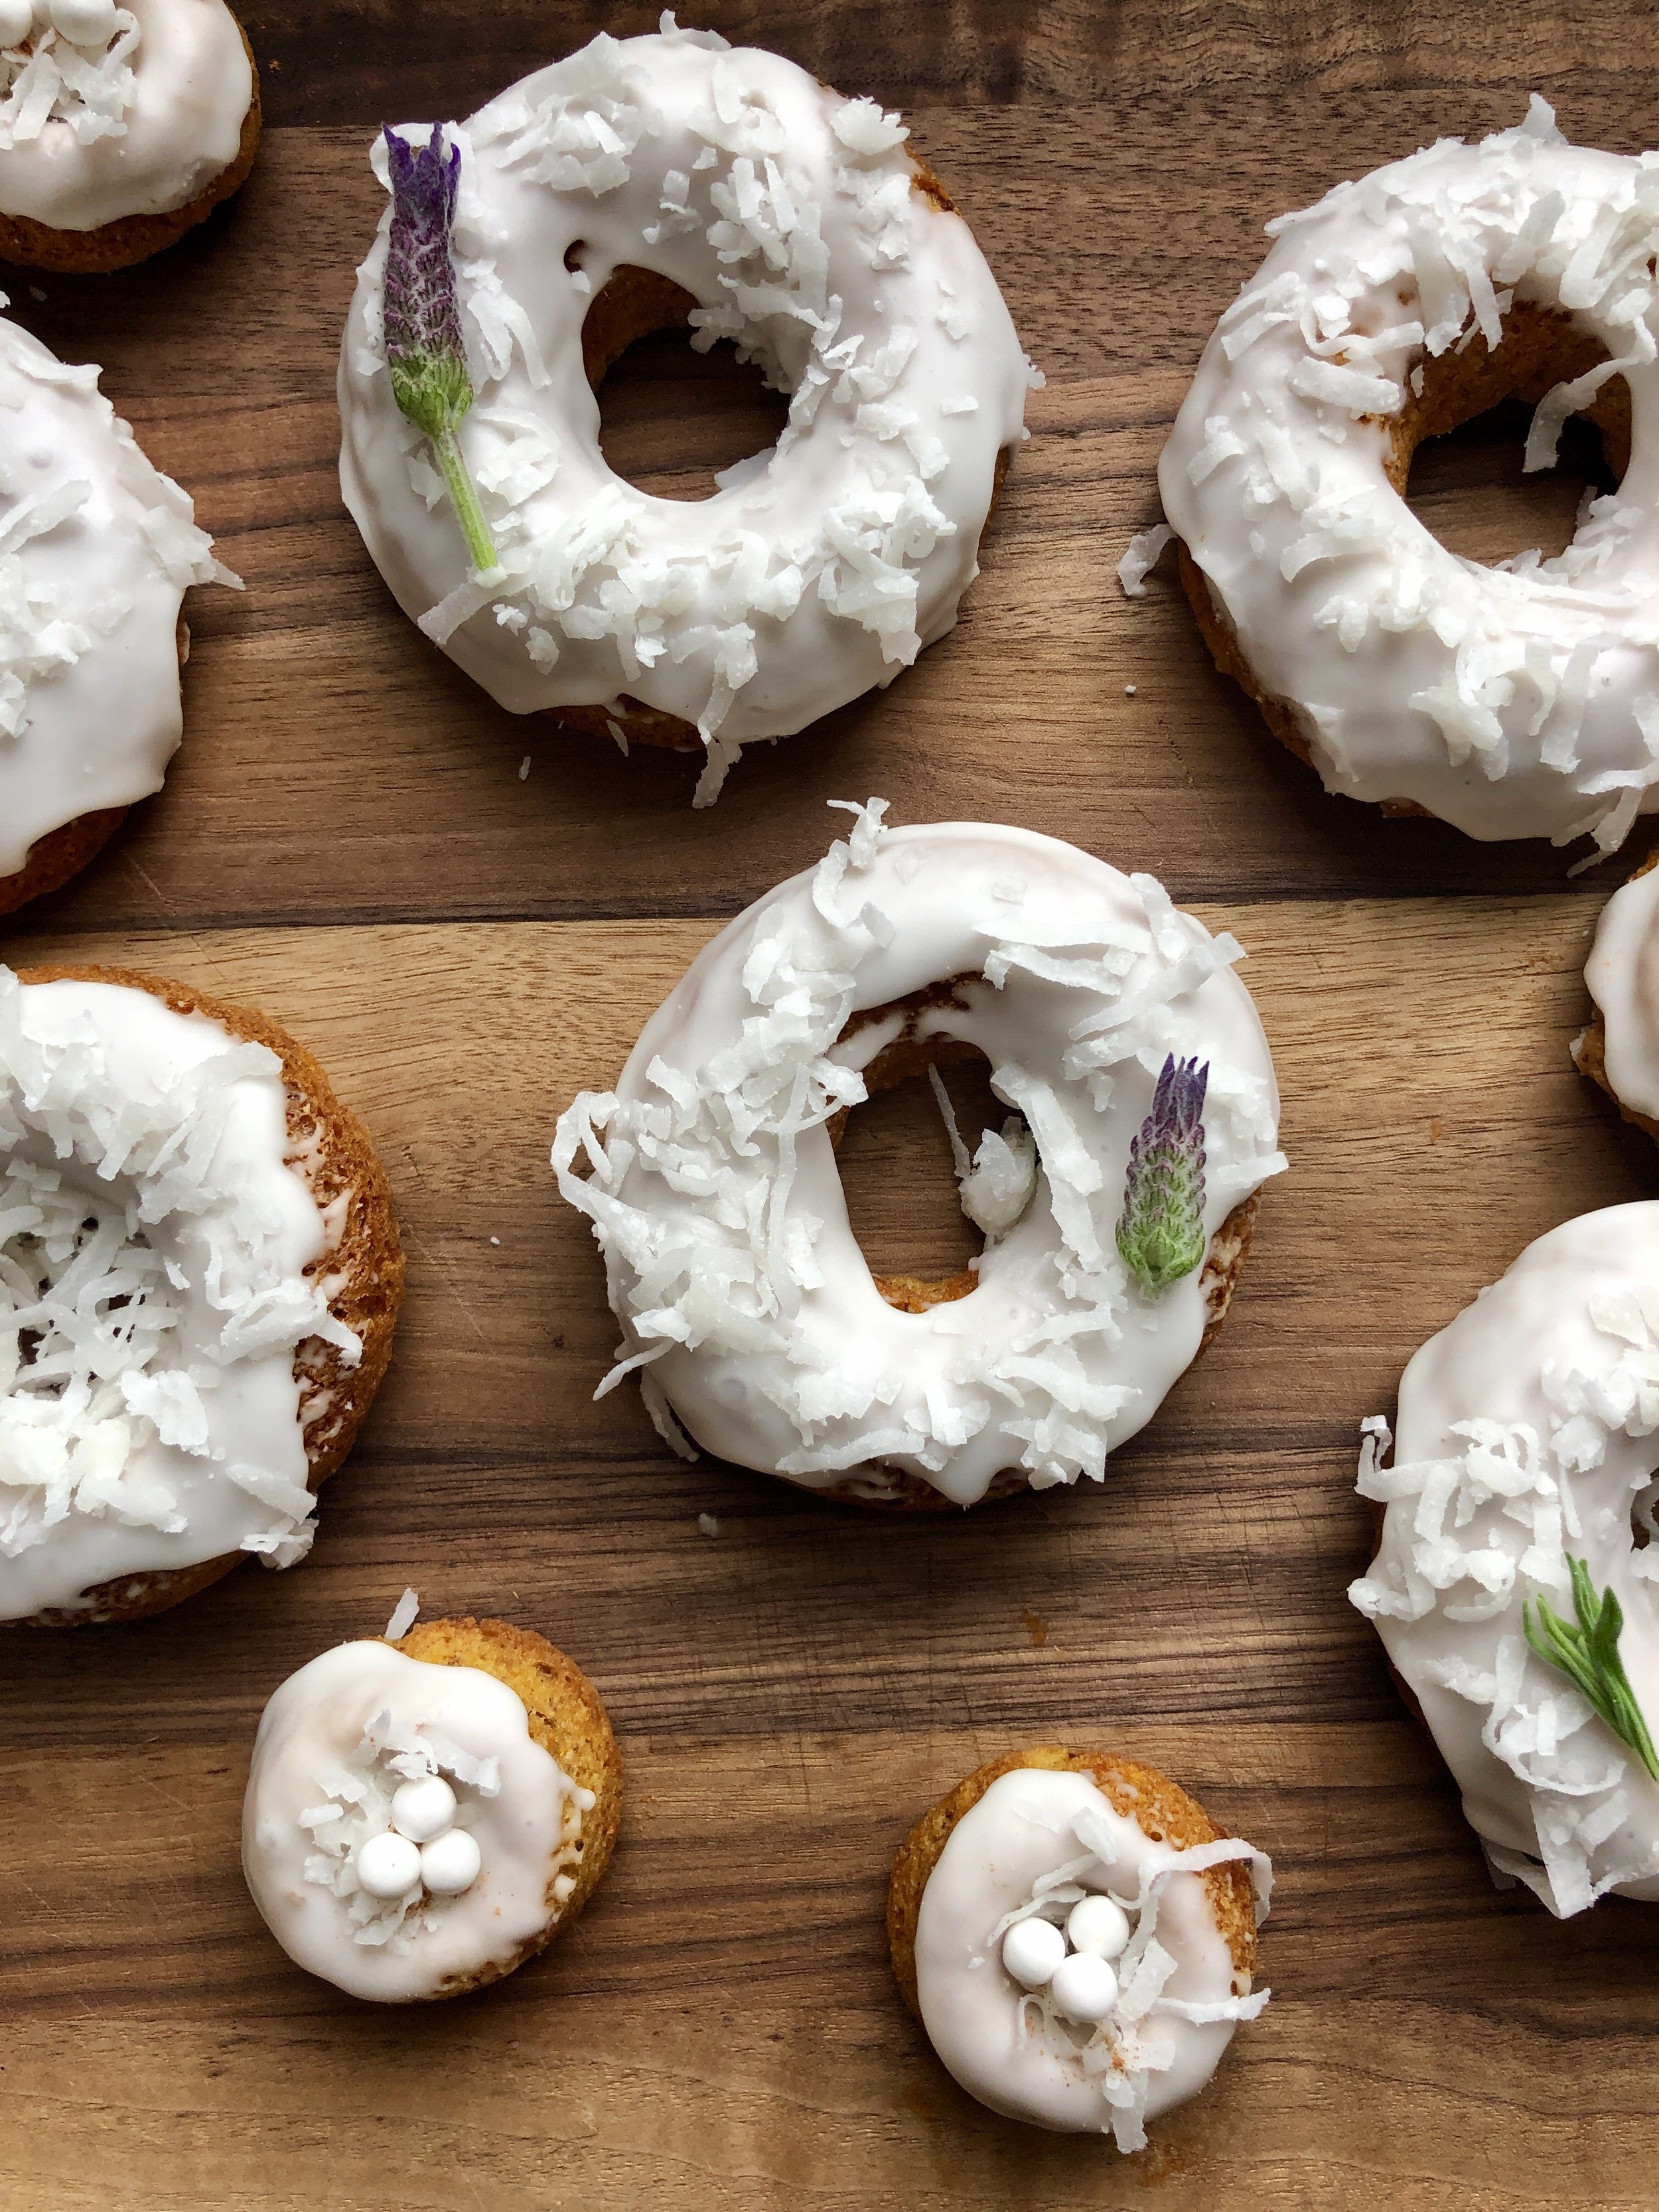
I know what you’re thinking, vegan and gluten free donuts, how could these possibly be any good!? Well my friends I am here to tell you that they are delicious. Vegan + gf baked goods CAN be just as scrumptious as the real deal! Not only does it offer a healthy alternative but it is fun to get creative with different ingredients in the kitchen.

With Easter right around the corner these Carrot Cake Donuts are the perfect treat for Easter breakfast or brunch. The donuts are baked instead of fried making them much quicker and easier to make. Grab your apron and get in the kitchen, these donuts are simple and fun to make. If you have little ones, let them help. Baking is a great way to get your kids involved in the kitchen, they’ll love it!

They even made an appearance on Fox 2 News St. Louis and were a huge hit!

Vegan + GF Carrot Cake Donuts

Ingredients:

DONUT BATTER:

1/2 cup packed brown sugar

1/4 cup coconut oil, melted

1 Tablespoon Earth Balance vegan butter, melted

1 flax egg (in a small bowl combine 1 Tablespoon ground flax + 2 Tablespoons water, let set for 2 mins)

3/4 cup unsweetened almond, coconut or soy milk

1 cup gluten free all purpose flour

1/4 cup almond flour

1/2 teaspoon salt

1/2 teaspoon baking soda

1 teaspoon baking powder

1 teaspoon cinnamon

1/4 teaspoon nutmeg

1 1/2 teaspoon pure vanilla extract

1 1/2 cups shredded carrots (approx. 2 large carrots or 4 medium)

GLAZE:

1 cup powdered sugar

2 Tablespoons soy creamer (or dairy free milk/cream)

1/4 teaspoon vanilla extract

Shredded coconut (garnish, optional)

Directions:

Preheat your oven to 400 degrees.

In large bowl or mixer fitted with paddle attachment mix melted coconut oil, melted vegan butter, brown sugar, vanilla extract, flax egg and shredded carrots until combined. Add in almond milk (or dairy free milk of your choice) and mix until smooth.

In a separate bowl sift together gluten free flour, baking soda, baking powder, salt, cinnamon + nutmeg. Add in almond flour and stir to combine.

Slowly add the dry ingredients into the wet ingredients and mix until smooth. Make sure everything is combined and there are no lumps. But do not over mix!

Spray the donut pans with pan spray. Spoon the batter into the donut pans, or using a piping bag, pipe the mixture into the pans just slightly under the rim.

Place into the oven and bake for approximately 20 minutes until slightly golden and the cake springs back when touched.

Remove from oven and let set for a second before turning pans over onto a cooling wrack and popping out the donuts. Let the donuts cool completely before dipping into glaze. For best results allow them to cool before tasting, the texture will develop as the donuts cool.

While your donuts are cooling make the vanilla glaze. Place powdered sugar, soy creamer (or dairy free milk) and vanilla into a small bowl and whisk until smooth. You can add more dairy free cream if the mixture is too thick or more powdered sugar if it is too thin. It should look glossy and be of dipping consistency.

Once all of the donuts have been dipped you can garnish with shredded coconut, chopped pistachios, fresh lavender or a garnish of your choice.

Let the donuts hang out until the glaze has set (try not to dig in quite yet!)

Store the donuts in an airtight container for 1-2 days.

These donuts are the perfect healthy-ish treat for Easter or any day for that matter. I hope you enjoy these as much as I did (Max + Ella loved them too!) Have a blessed Holy Week and a lovely Easter with your family & loved ones!

carrot cake donut.jpeg

Chicken/Veggie Pot Pie

IMG_8597.jpg

There is nothing more inviting than a savory chicken (or vegetable) pot pie on a cold fall/winter evening. My husband, Max, has been begging me to make him a classic Chicken Pot Pie. I normally stick to vegetarian dishes but I gave in and boy was it worth it! It was so delicious and much easier than I thought to make. I am now inspired make all sorts of veggie pot pies this winter!

This is one dish you will want to make again & again! So, grab a glass of red wine (this cab is my fav rn) throw on your slippers and get ready for a cozy evening in the kitchen with your family.

Now, you can make this dish extremely simple and go buy a pre-made pie crust BUT I highly recommend making it from scratch. My pie crust is easy to make with just a few ingredients and creates a delightful buttery & flaky crust that can’t be beat!

Yield: one 9” pie

Pie crust:

1 3/4 - 2 cups all purpose flour, unbleached

1 Tbsp sugar

3/4 tsp salt

1 1/2 sticks unsalted butter, cold

1/2-3/4 cup ice water

egg wash: 1 beaten egg + 1 Tbsp water

Filling:

2 medium chicken breasts, cubed (for vegetarian you can pass on the chicken and just add more veggies)

1 Tbsp unsalted butter

1 Tbsp extra virgin olive oil

1 cup sliced carrots

1/2 cup english peas (or frozen peas)

1/2 cup sliced celery + 1 Tbsp chopped celery leaves

1/2 cup chopped yellow onion

1 tsp sea salt (add more to taste)

1/2 tsp fresh ground pepper (add more to taste)

1/2 tsp chopped thyme

1/2 tsp chopped rosemary

2 Tbsp chopped parsley

1/4 cup all purpose flour, unbleached

1/2 cup unsweetend almond milk (or 2% milk)

1 cup vegetable broth (or chicken broth)

*For vegetarian you can also add in zucchini, squash, green beans, etc!)

For the crust:

Combine flour, sugar & salt into a mixing bowl. Stir to combine. Cut cold butter into cubes and add into the flour mixture. Using a pastry cutter, fork or your hands cut butter into flour until the chunks of butter becomes about the size of a pea. Add in 1/4 cup of very cold water and gently combine. Continue to add water a little bit at a time just until the dough comes together. (You may not use the entire 3/4 cup of water) It should not be sticky, if you added to much water add a little more flour but try not to over work the dough! Form the dough into 2 equal size discs, wrap in plastic wrap and place in the fridge for 30 minutes or over night.

For the filling:

Preheat your oven to 425 degrees.

In a large skillet, combine butter & extra virgin olive oil over medium heat. Add carrots, celery, celery leaves, onion, s&p, rosemary & thyme and sauté until the onions become translucent. Be sure to stir throughout to make sure the onions do not burn. Add cubed chicken and sauté for 8-10 minutes. Stir in flour and then stir in almond milk or milk until smooth and there are no lumps of flour. Add vegetable broth and stir to combine. Cook until the mixture becomes bubbly and thick. (it will not be super thick since we are using a lighter milk instead of heavy cream but it will still thicken) Next add the peas and chopped parsley to the filling. Stir, remove from heat and let cool.

To assemble:

While the filling is cooling, take your pie dough out of the fridge (after 30 mins or more of chill time). Remove the plastic wrap. On a lightly floured surface roll 1 disc into an approximate 12” circle about 1/8”- 1/4” thick. Transfer dough into a 9” pie pan. Press into the bottom of the pan and trim the extra dough hanging over the side of the pan with a knife. (I save my scraps, brush on egg wash and sprinkle with cinnamon & sugar and bake them for a yummy treat!)

Once your filling has cooled (it can still be warm just not super hot) pour the filling into the pie. Roll out the 2nd disk of dough and carefully place over the pie. Trim the extra dough and seal by crimping the edges together. Cut 3-4 slits into the center of the pie with a sharp knife and brush top and edges of the pie with egg wash. Bake for 30-45 minutes until the crust is golden. (I like using a clear pie pan so I can see through to make sure the bottom is golden!) Let set for about 15 minutes before slicing and serving. It’s so hard not to dig in right away but letting it set will make slicing it much easier!

I hope you enjoy this just as much as we did! It’s one of those cozy comfort meals that the whole family will love!

IMG_8608.jpg

Roasted Peach + Vanilla Bean Sundae

This post is in partnership with Turkey Hill Ice Cream, thanks for supporting their brand along with MADE. SIMPLE!

IMG_4566.jpg

Who else is screamin' for ice cream on the daily this summer? When I want to treat myself my go to is always ice cream but not just any will do. Turkey Hill recently launched an all natural ice cream line made with ONLY 4 ingredients (cream, sugar, milk and vanilla bean) and NO artificial flavorings. Like everything I make, Turkey Hill ice cream is MADE. SIMPLE! 

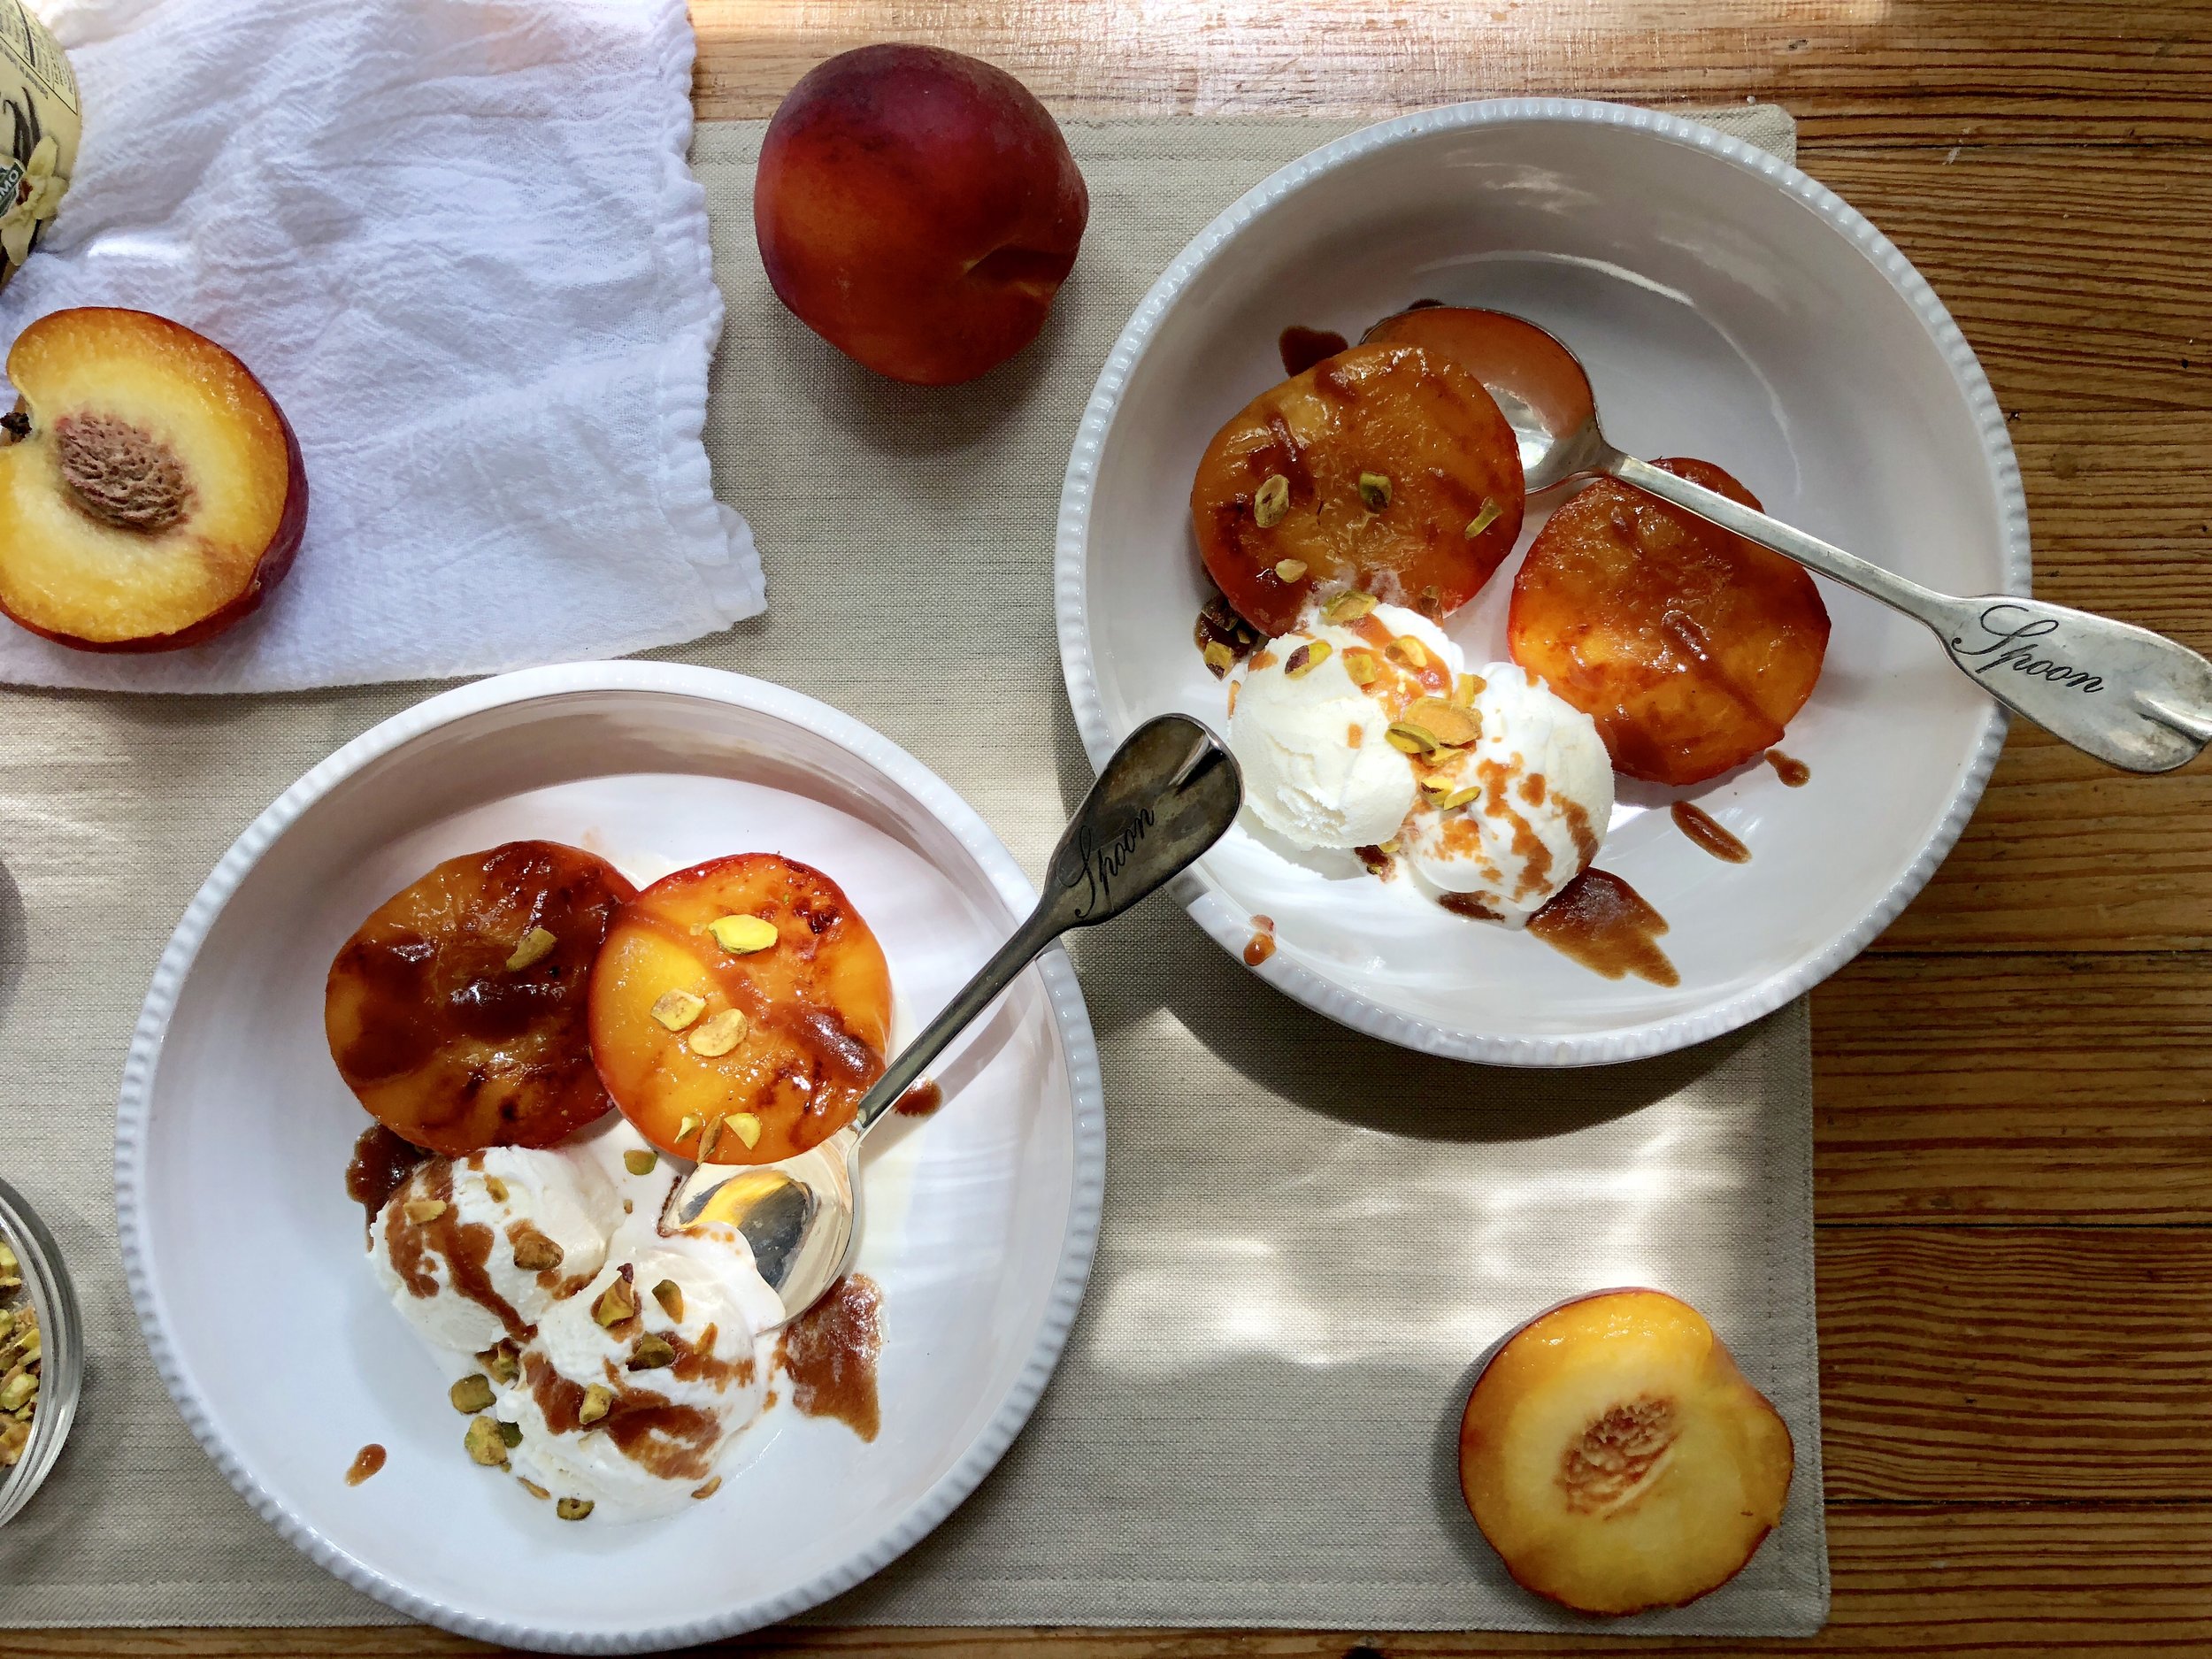
Some people prefer their ice cream in a cone but I'm a bowl kind of gal. For this heavenly ice cream sundae I chose Turkey Hill's all natural vanilla bean ice cream to pair with my roasted peaches and oh my it was absolutely delicious! 

Roasting the peaches in olive oil enhances their flavor and pairs perfectly with the sweetness from the ice cream. To take it to the next level drizzle on some salted caramel & top it off with chopped pistachios. This flavor combo is seriously amazing. I am not a fan of desserts that are overly sweet and this has the perfect balance. A delightful treat without making you feel too guilty!

For the roasted the peaches: 

Serves 2

2 peaches- cut in half

Extra virgin olive oil 

1 Tbsp raw sugar 

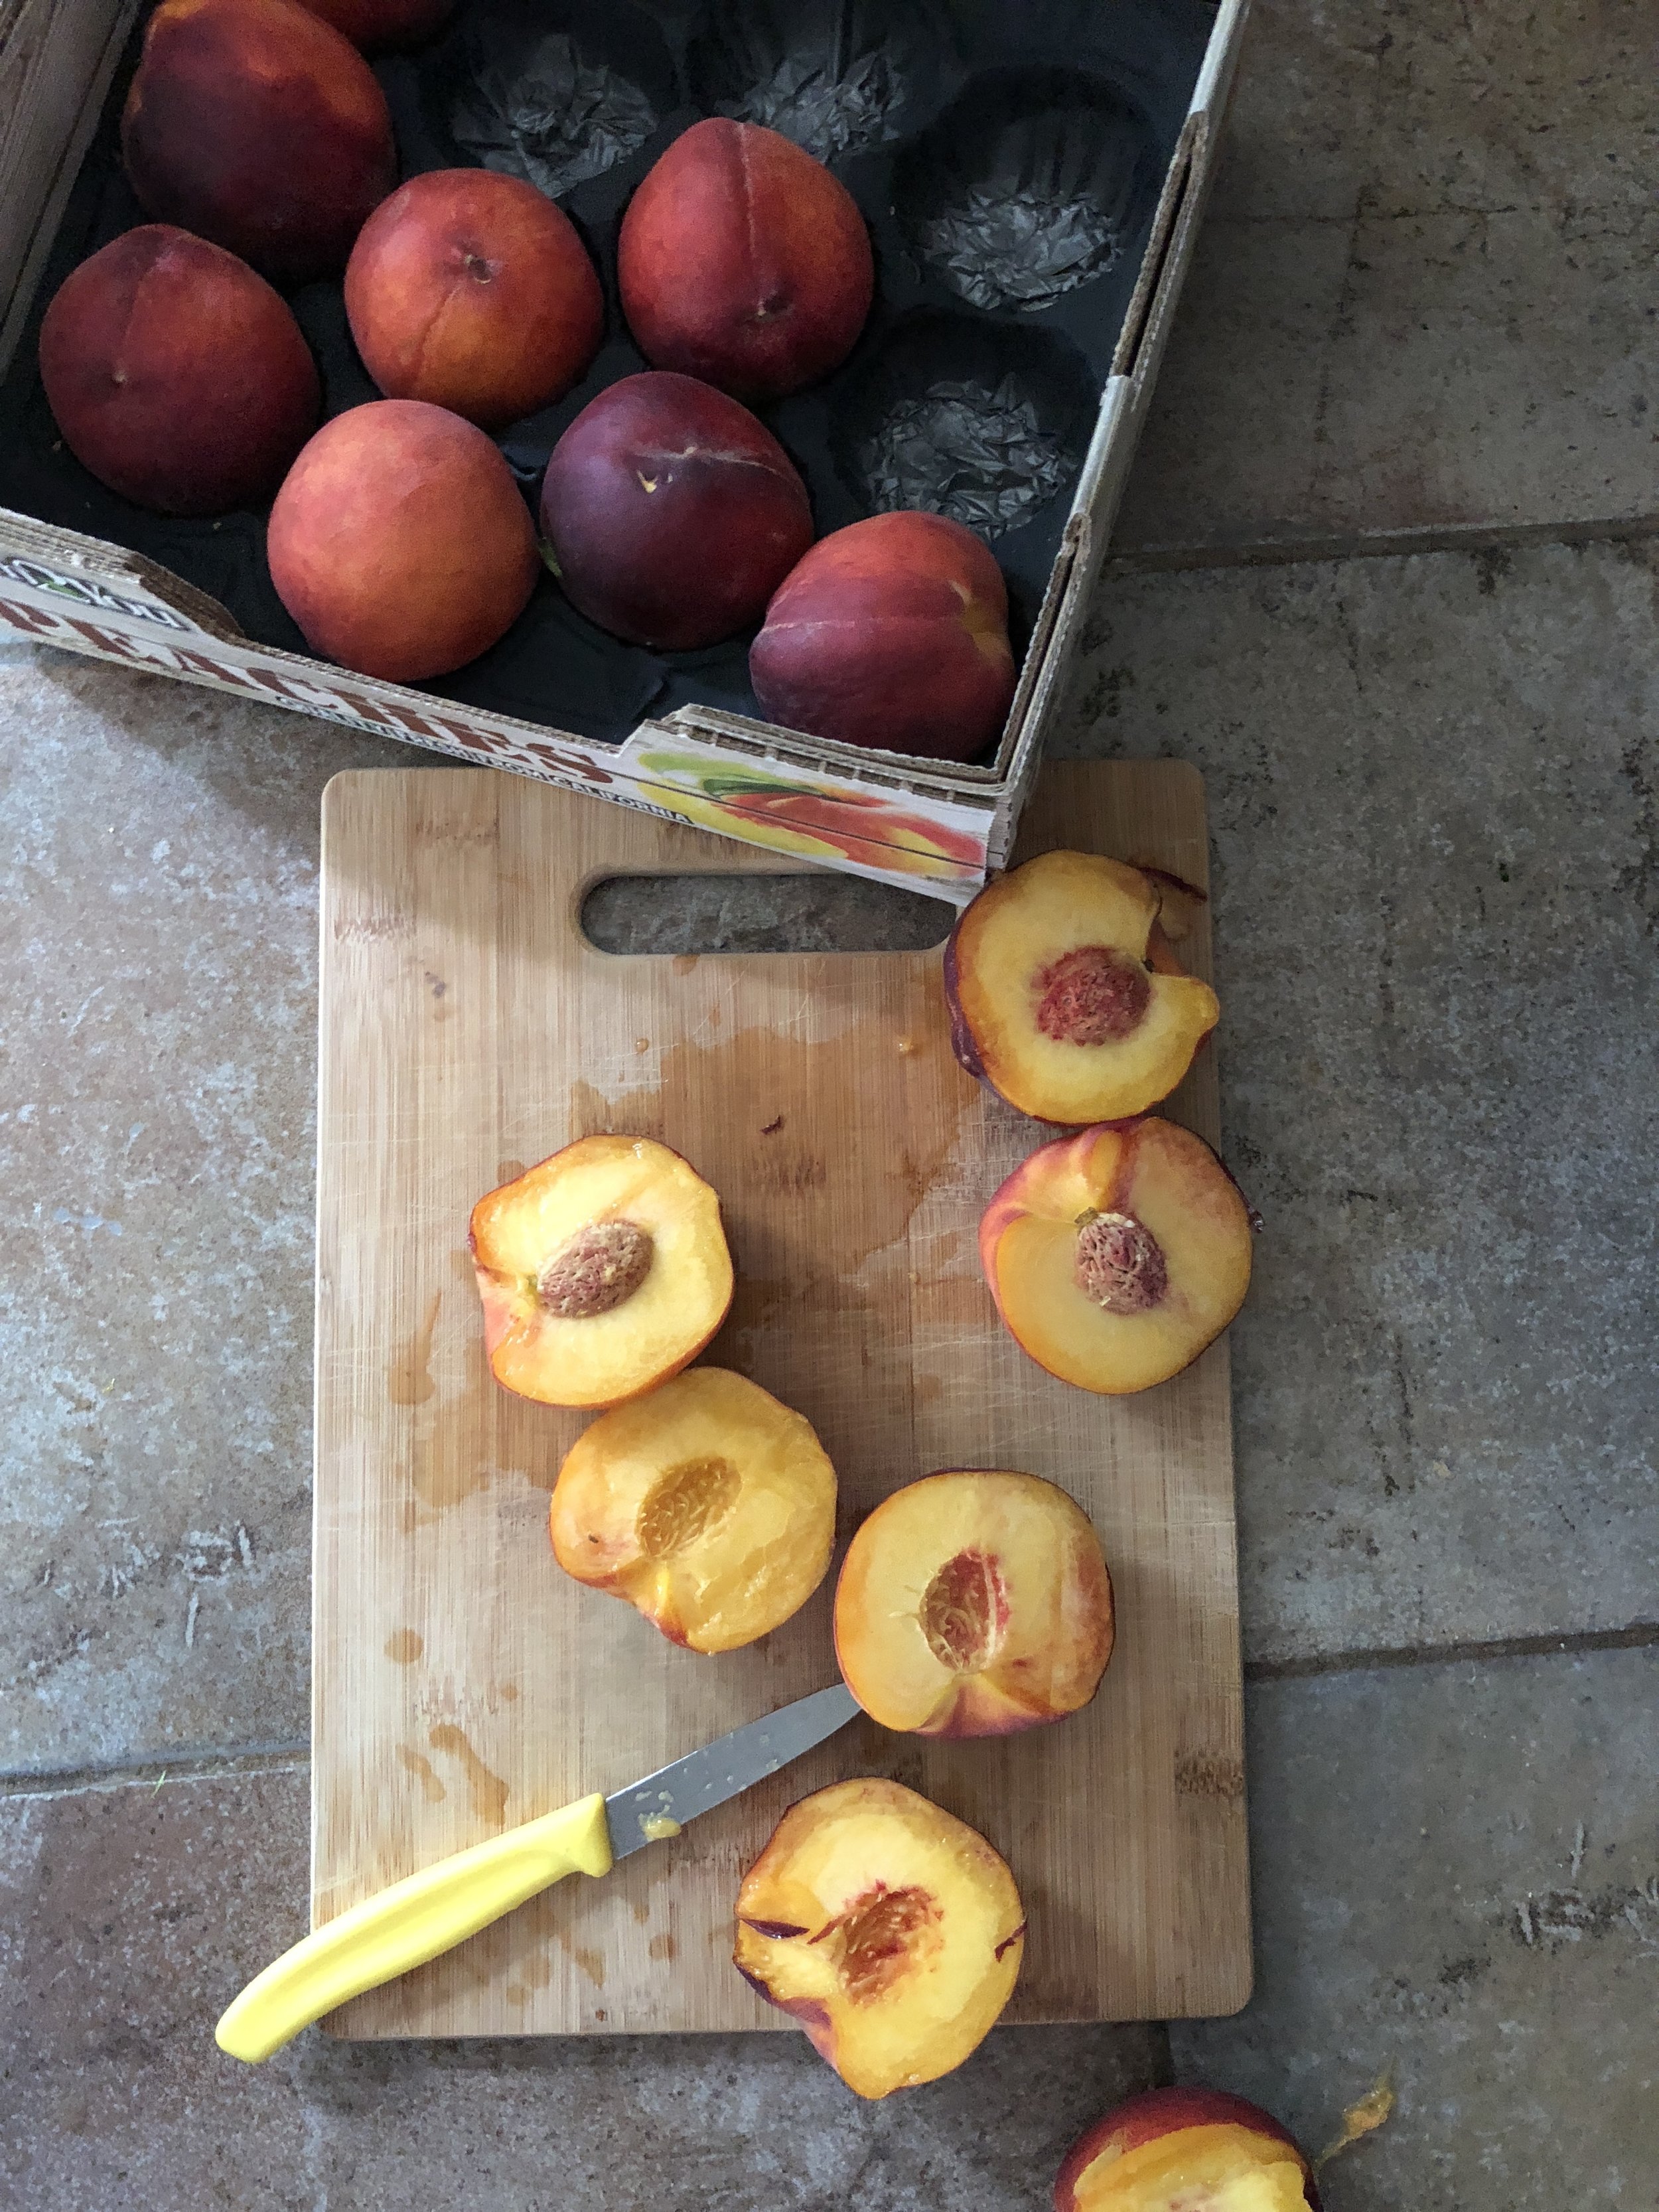
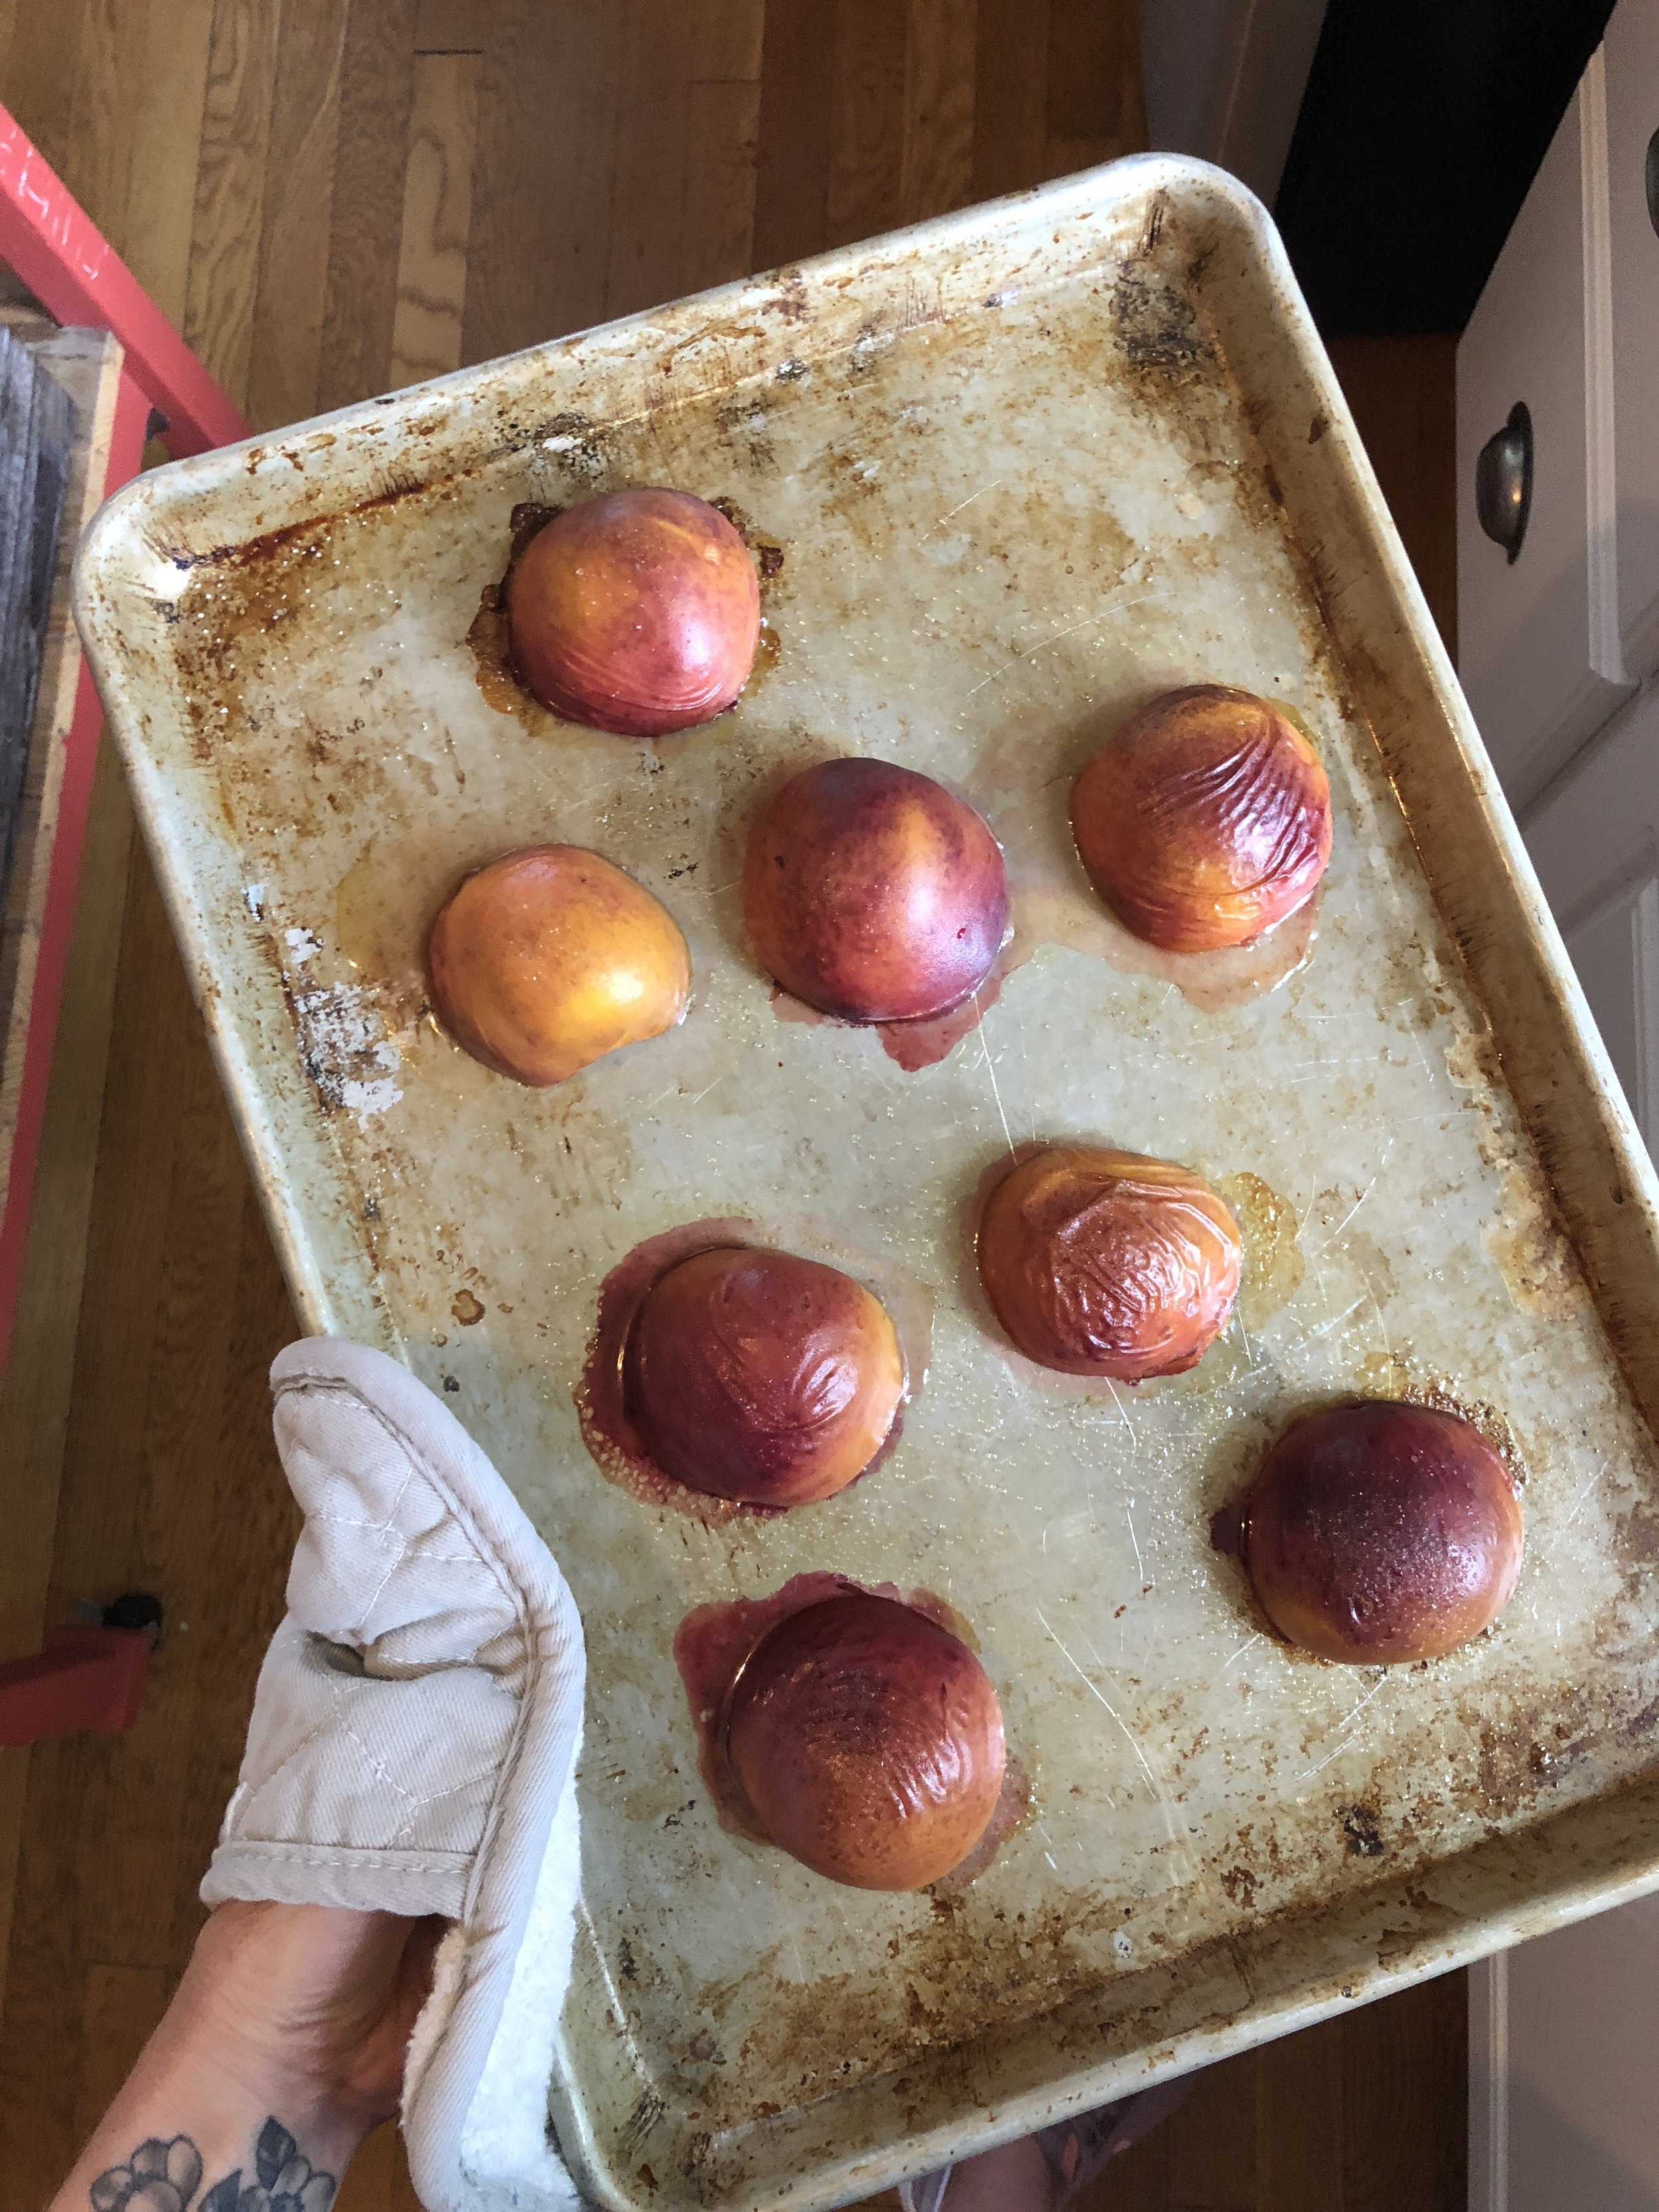
Preheat your oven to 400 degrees. While the oven is pre-heating, wash and dry the peaches. Cut them in half and remove their stones. Lightly grease the bottom of a sheet pan with extra virgin olive oil and rub the peaches with olive oil as well. Place the peaches cut side down onto the sheet pan and sprinkle with raw sugar. Roast them in the oven for approximately 15 minutes, the peaches should be slightly soft to touch (not too soft) and the skin will look wrinkly. Once you remove the peaches from the oven, carefully peel off the skin. Using a spatula remove them from the sheet tray and place them on a plate to cool. For a little extra pizazz, one minute on a grill pan will provide additional color to the peaches. 

For the Salted Caramel: (You may use store bought if desired to save time!)

IMG_6543.jpg

1/2 cup sugar 

1 tsp honey

2 Tbsp water

1/4 tsp coarse salt 

1/2 cup heavy cream

1/4 Tbsp butter 

1 tsp bourbon (optional) 

Combine sugar, salt, honey & water into a saucepan. Cook over low/medium heat (do not stir!) until the sugar dissolves and turns dark amber in color.  Remove from heat, slowly whisk in heavy cream & butter (and bourbon if desired). Return back to medium heat & cook until the temperature reaches 235-240 degrees. Let cool and pour into a glass bowl. If you have extras, store in an air tight container for several weeks.

For the sundae: 

Turkey Hill's all natural vanilla bean ice cream 

1/4 cup salted caramel (homemade or store bought)

1/4 cup chopped pistachios 

IMG_4582.jpg

To assemble:

Scoop 2 (or more) scoops of Turkey Hill vanilla bean ice cream into a bowl. Place 2 peach halves into the bowl, drizzle with salted caramel and top with chopped pistachios. Grab a spoon and dig in! 

Want to try Turkey Hill ice cream for yourself? You're in luck! Turkey Hill is going on a Good Mooed sampling tour in select U.S. states from the East Coast to the Midwest showing off their all natural ice cream. Oh, and did I mention there will be samples?! YUM!  Follow this link to see if the big cow will be stopping by a town near you this summer! You can also visit this link to find Turkey Hill Ice cream at your local grocery store. There's no doubt a bowl (or cone) of their ice cream will put you in a Good Mooed! 

unnamed-4.jpg

<!-- Turkey Hill Tracking Pixel [async] -->

<script type="text/javascript">if (!window.AdButler){(function(){var s = document.createElement("script"); s.async = true; s.type = "text/javascript";s.src = 'https://servedbyadbutler.com/app.js';var n = document.getElementsByTagName("script")[0]; n.parentNode.insertBefore(s, n);}());}</script>

<script type="text/javascript">

var AdButler = AdButler || {}; AdButler.ads = AdButler.ads || [];

var abkw = window.abkw || '';

var plc306538 = window.plc306538 || 0;

document.write('<'+'div id="placement_306538_'+plc306538+'"></'+'div>');

AdButler.ads.push({handler: function(opt){ AdButler.register(169147, 306538, [1,1], 'placement_306538_'+opt.place, opt); }, opt: { place: plc306538++, keywords: abkw, domain: 'servedbyadbutler.com', click:'CLICK_MACRO_PLACEHOLDER' }});

</script>


Vegan Lettuce Wraps

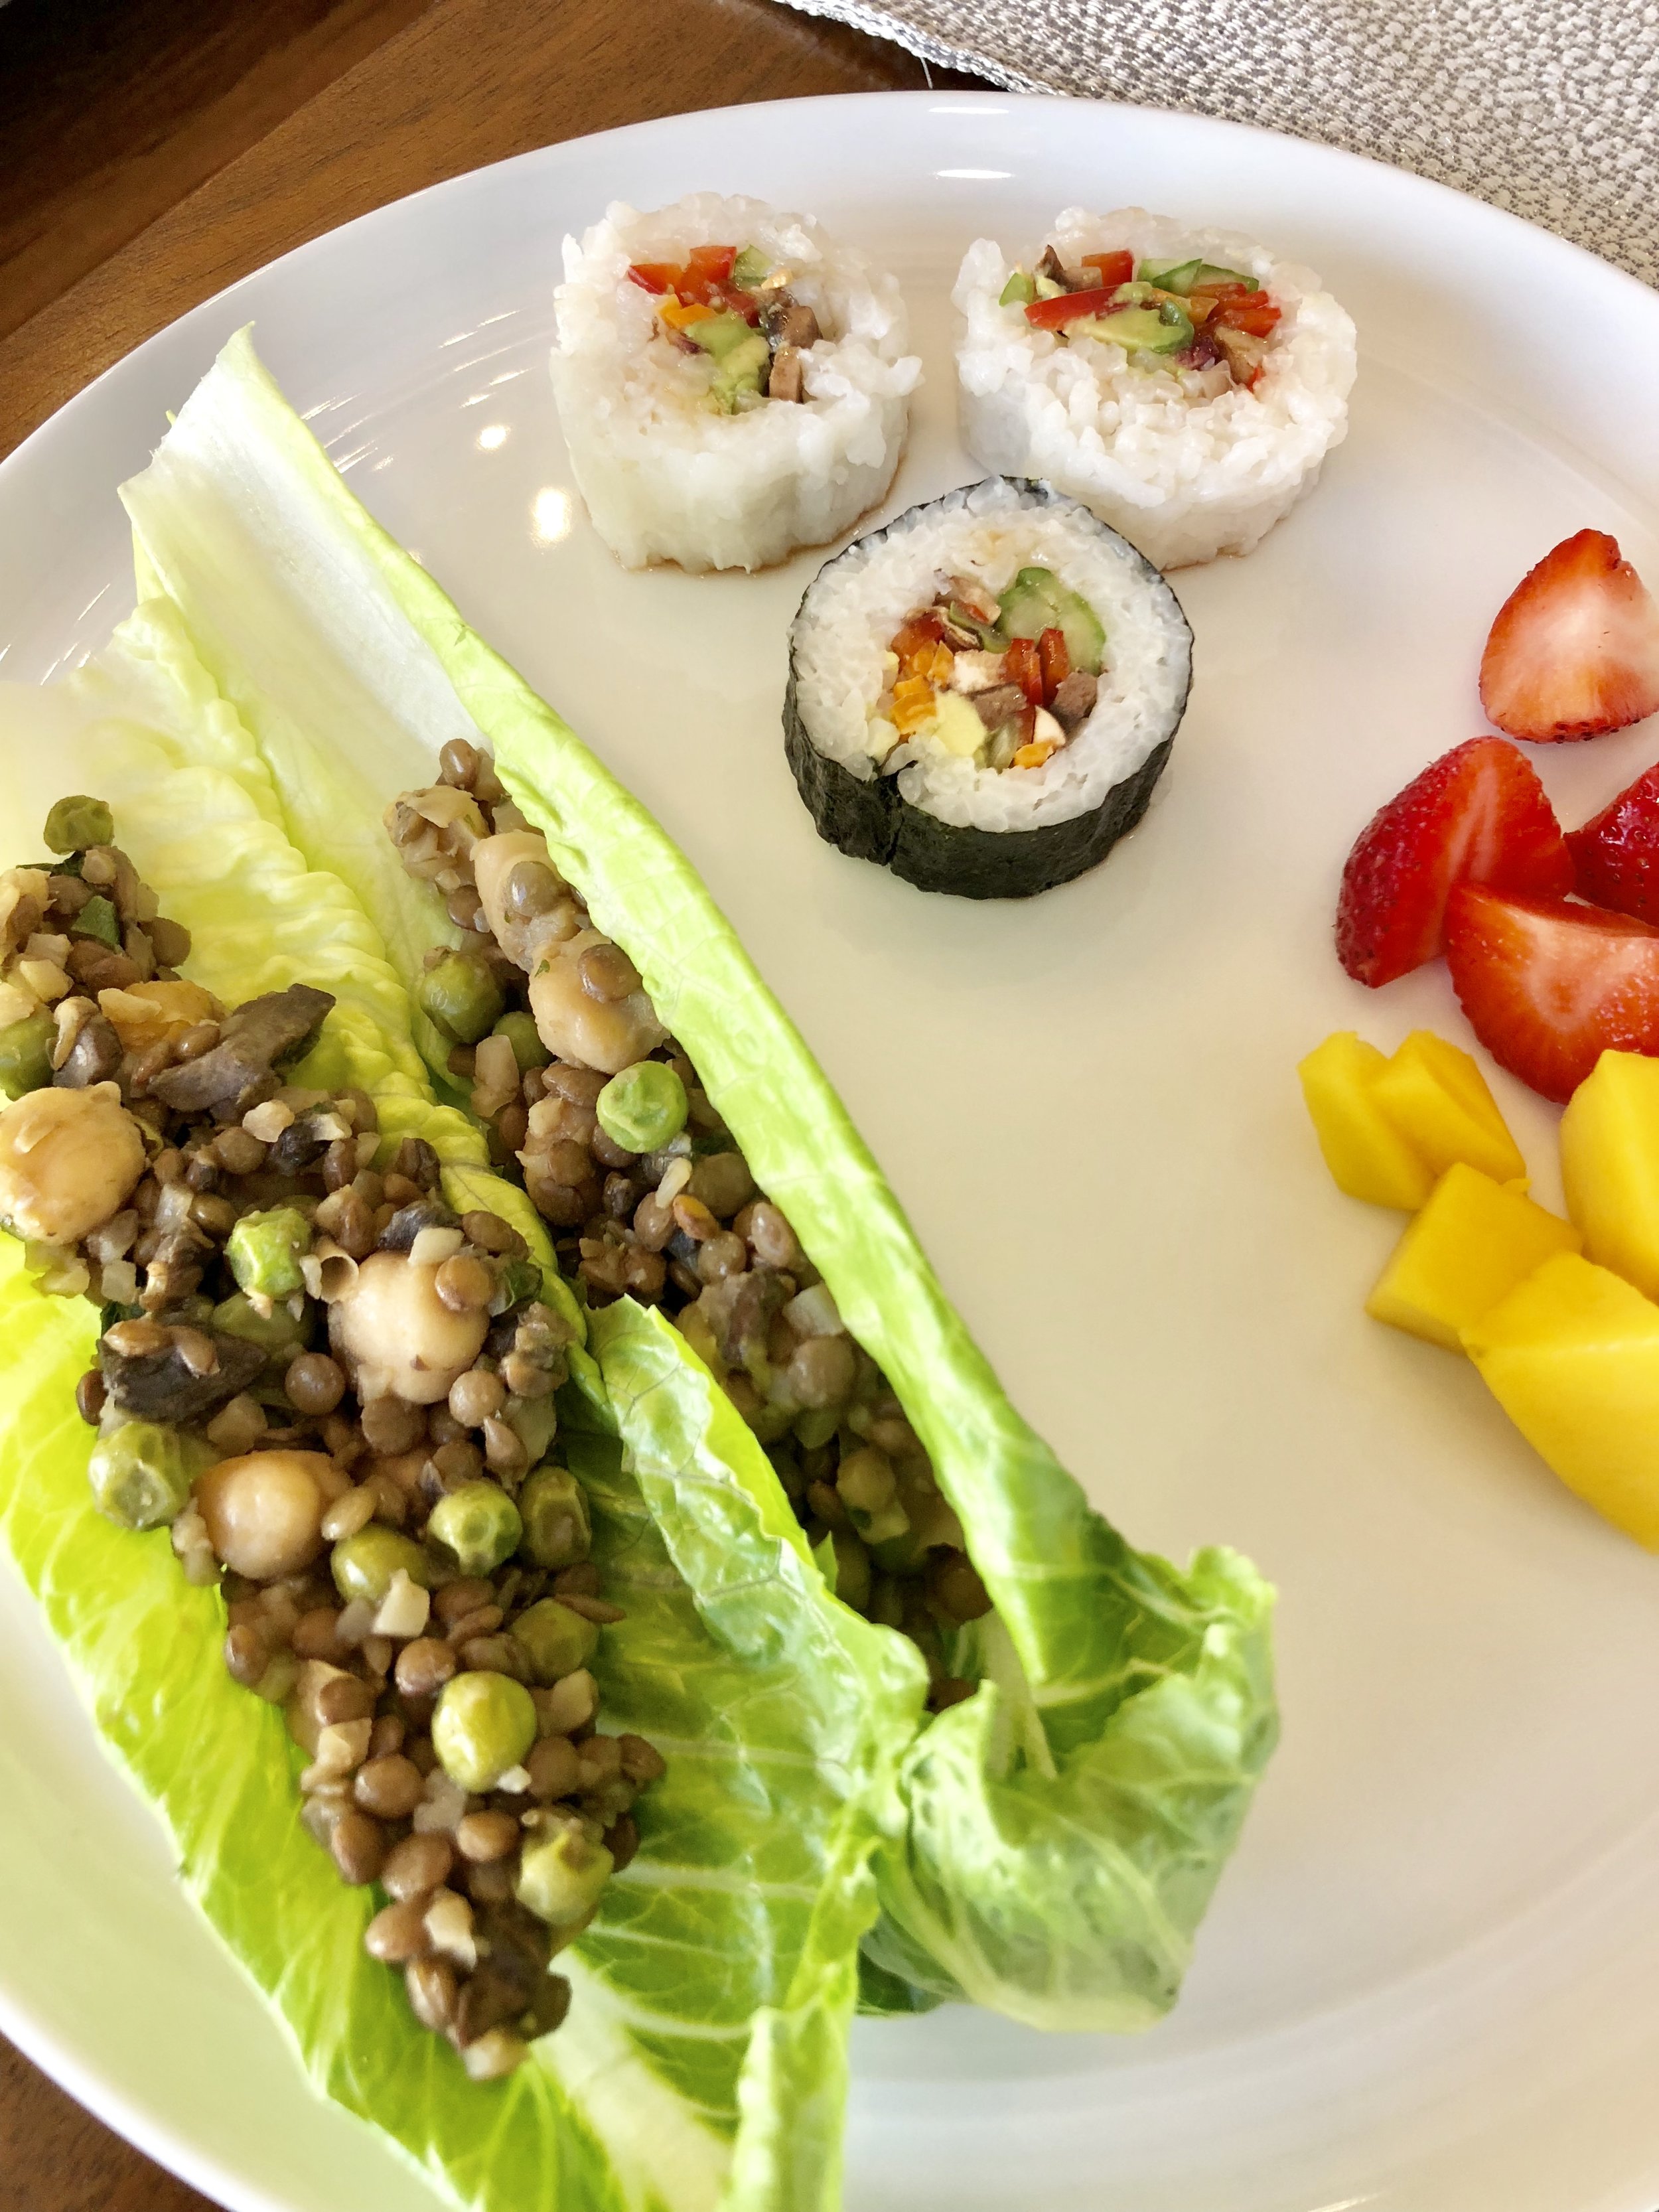
While I was making this dish I honestly wasn't sure how it was going to turn out. I just kept adding a little of this & a little of that, but the end result was too delicious not to share! These lettuce wraps are so fresh, crisp and savory. Take this dish to the next level by making my sweet umami sauce to drizzle on top or dip right on in. Seriously, so good! 

IMG_0870.jpg

For the filling:

1 green onion- chopped (feel free to add more)

1-2 Tbsp olive oil 

1/4 cup fresh cilantro- chopped

1 cup mushrooms- chopped fairly small

1 can garbanzo beans- drained (no need to rinse)

1/2 cup frozen peas 

2 cups cooked green lentils 

1 cup frozen cauliflower rice 

1/4-1/2 cup low sodium soy sauce 

1 tsp fresh grated ginger

2 tsp sesame oil 

2 tsp rice vinegar 

1 pinch of red pepper flake

salt & pepper to taste 

Heat olive oil in a large skillet over medium heat. Add in green onions & cilantro and sauté until fragrant & softened, approx 1 minute. Toss in mushrooms and sauté until tender. Next, add in the remaining ingredients: garbanzo beans, frozen peas, cooked lentils, frozen cauliflower rice, soy sauce, spices, etc.  Sauté for several minutes until all veggies are tender yet still have a little crispness to them. Turn heat to medium-low and let simmer, stirring occasionally and adjusting seasoning to your liking. 

Sweet Umami Sauce (pure deliciousness) 

1/4 cup soy sauce 

2 Tbsp sesame oil 

2 Tbsp rice vinegar 

1/2 tsp fresh or ground ginger

IMG_0887.jpg

2 Tbsp seedless blackberry jam or any jam you have at home

In a small bowl, whisk all ingredients together. So simple yet so complex. This is also the perfect dipping sauce for sushi! 

To assemble: 

1 head of crips romaine lettuce

Wash, dry and separate the lettuce. Fill the lettuce with the filling & top with sweet umami sauce! YUM!

IMG_5586.jpg

Pesto "Cream" Sauce Pasta

The time of year is approaching where fresh basil will be grown in abundance & I can't wait! I love all things basil and this Pesto Cream Sauce is out of this world. It reminds me of when I traveled to Italy with a few girl friends of mine. We went to the local market in Florence, picked up some fresh handmade pasta, a block of parm cheese, cream & a jar of pesto and headed back to our apartment to make dinner. That was the first time I've ever had a pesto cream sauce and dang it was so good.

I have dreamt of that pasta many times, hoping to someday recreate it. I am now dairy free and am delighted to say that I have discovered a way to make it so similar & so delicious that you wouldn't even know that it's vegan!  I combined homemade Pesto + my Cashew Cream Sauce to make a bright, flavorful & creamy pesto sauce. I can't say for sure but I have a feeling you will want to go back for seconds.... and thirds.

Now let's open up a bottle of wine (a crisp Sauv Blanc or buttery Chardonnay would pair beauitfully) & get cooking! 

IMG_0410.jpg


First things first, start by preparing your Cashew Cream Sauce - (Click to be directed to the Cashew Cream Sauce recipe) pour into a bowl and set aside. (No need to wash your food processor, you will be making the pesto in it too.) You will need approx 1- 1 1/2 cups for this dish. Refrigerate or freeze the remaining sauce for a future meal! This sauce is a two step process so first make your cashew cream and then make your pesto. I know it may seem complicated but it is actually super simple to make! See below for the pesto recipe. 

For the Pesto:

IMG_8816.jpg

2 cups fresh Basil 

1 Tbsp Walnuts 

1/4-1/2 cup extra virgin olive oil

1/2 lemon- juiced 

1/4 tsp salt 

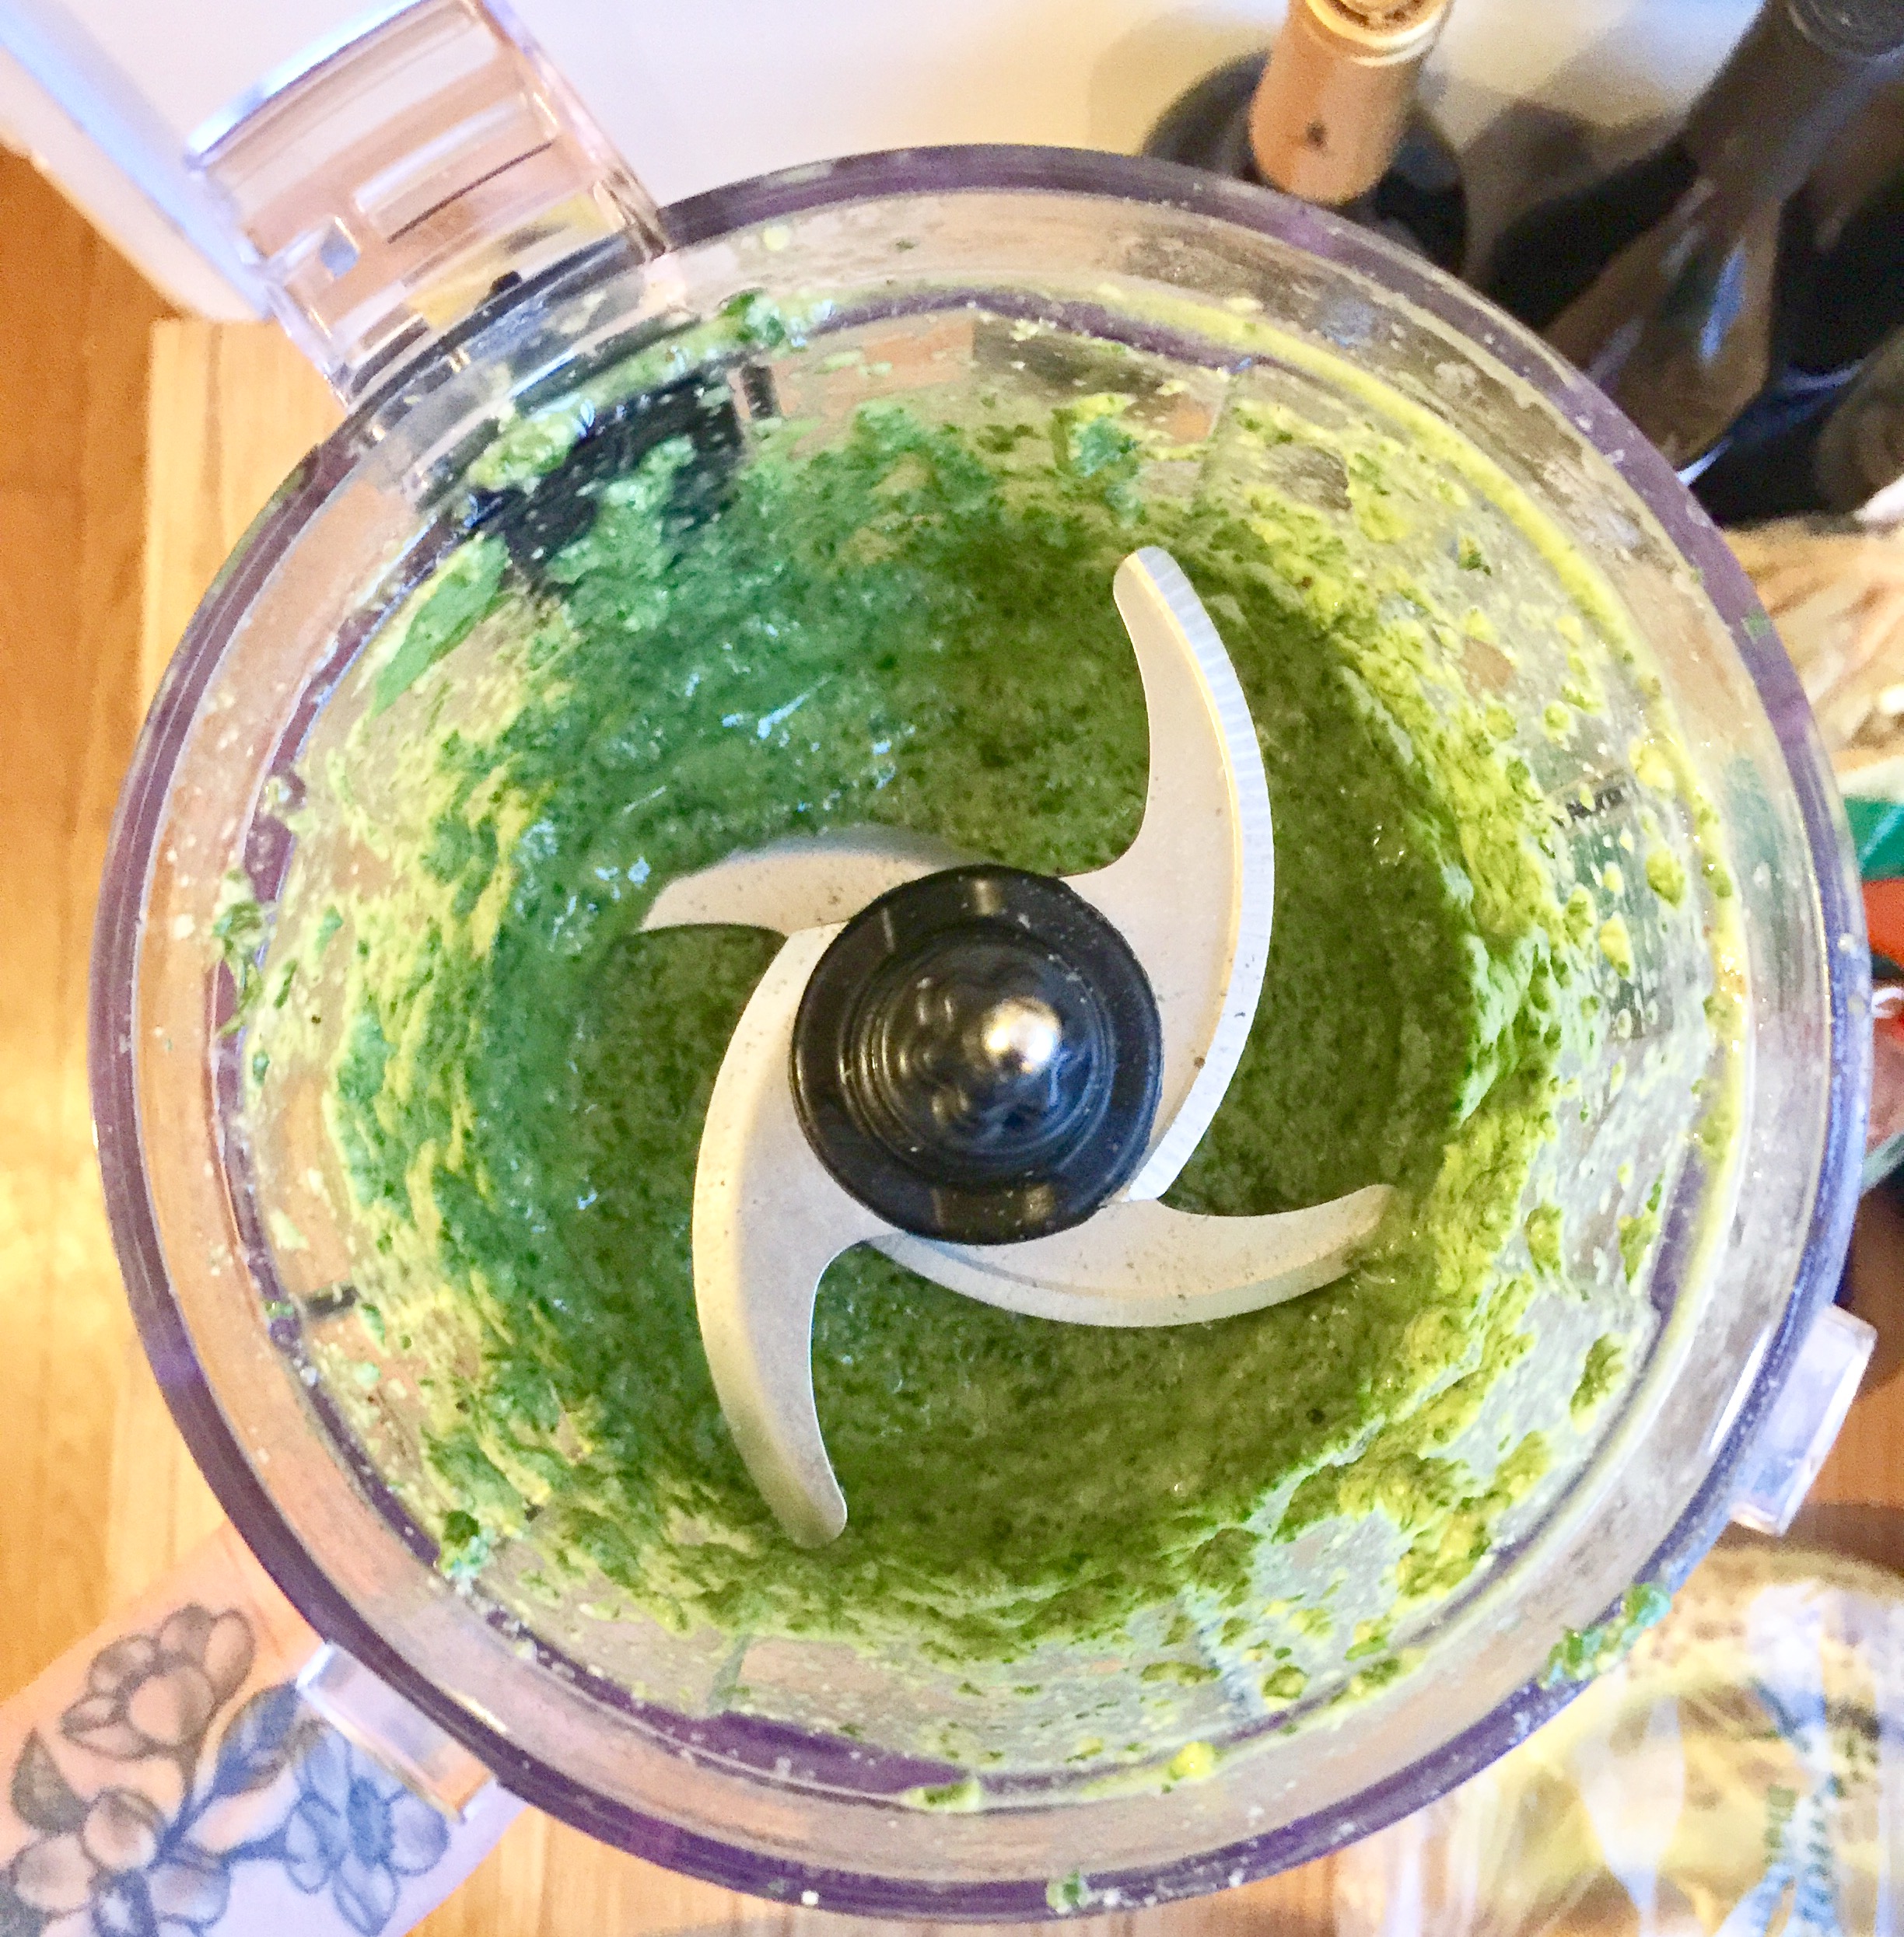
Combine basil, walnuts, lemon juice & salt in a food processor. While the machine is running, slowly drizzle in olive oil until the pesto is smooth. Pour into a bowl & set aside. 

For the pasta:

IMG_0414-2.jpeg

8 -10 oz or roughly half of a 16oz bag of Capellini pasta (Penne works wonderfully with this sauce too!)

1 bunch of asparagus, chopped (or veggies of choice)

1/4 cup vegetable broth or white wine 

1 cup chopped aruglua

salt & pepper to taste 

2 Tbsp EVOO (extra virgin olive oil)

optional add ins: 1/4 cup chopped onion, 1 clove minced garlic

Fresh chopped Basil for garnish

Directions:

In a medium stock pot bring water + 1 teaspoon salt to a boil. 

While your water is coming to a boil, in a medium/large skillet sauté 2 Tbsp olive oil, (onion/garlic till translucent if desired) & then add in the  asparagus. Sauté until the asparagus are slightly softened but still crisp. Deglaze the pan with the 1/4 cup of veggie broth or white wine. Just let this hang out & simmer on low. 

Once your water has come to a boil, break capellini in half and add to the pot. Stir to ensure the noodles do not stick together. Cook the pasta until al dente, approximately 3 minutes. 

Now this is a super important step! DO NOT I repeat DO NOT ever drain your pasta water. It is an essential ingredient to all pasta sauces. I learned this trick from my girl Lidia on PBS Create and I am forever grateful. It makes me happy to now pass on this secret to you! 

So, using a pasta ladle or small strainer with a handle, scoop out the pasta directly into the skillet with your asparagus and broth. Using tongs stir the pasta allowing all the ingredients to mingle. Then add in your pesto and start with 1 cup of cashew cream sauce. Stir to combine. Add in the chopped arugula.

Next, this is where your pasta water comes into play. Start with ladling 1 scoop of the hot pasta water to your pasta(approx 1/4 cup at a time). Stir with tongs to make sure all of the noodles are coated with the creamy pesto. If you like your pasta a bit more saucy, add more pasta water! If you feel it’s too thin then add in more cashew cream. Simple as that! 

Serve on a large plate or bowl & garnish with fresh chopped basil. Sprinkle on some vegan parmesan cheese if you have it!  Bon appetite! 

Cilantro Lime Burrito Bowl

Burrito bowls are so easy to make and are perfect for a quick lunch or dinner.  It's one of those healthy meals that you actually feel full after eating and is ridiculously tasty. I usually just add whatever veggies, rice & beans I have on hand but this combo is one of my favorites! The Cilantro Lime sauce adds a delicious creaminess to the dish and gives it that extra pop of flavor. 

IMG_0855.jpg

Cilantro Lime Burrito Bowl:

Serving size: 1 

1 cup cooked Brown Rice - If I don't have any cooked rice on hand I use Trader Joe's frozen brown rice, it's quick & easy. 

1/4 cup Black Beans - I warm the entire can (drained) in a sauce pan with a little chili powder, s&p and cumin. Then save the leftovers for a salad or soup later that week. 

1/4 cup cooked Green Lentils- I make my own (directions on the package) and save the leftovers. But if you are in a bind Trader Joe's has delicious precooked lentils. 

1 small ripe Avocado - sliced 

5 Cherry tomatoes- halved 

1/4 cup Arugula 

1 Lime wedge 

1 Tbsp fresh Cilantro- chopped

1 Tbsp Olive oil - drizzle on top 

1/4 tsp Chili powder- sprinkle on top


Cilantro Lime Sauce: 

IMG_0846.jpg

1 avocado 

1/2 cup fresh Cilantro 

1 - 2 Limes -juiced 

2-3 Tbsp Extra virgin olive oil 

Water to thin 

Dash of salt & peppa

In a food processor or blender, combine all ingredients except olive oil & water. Slowly drizzle in olive oil. Add water 1 Tbsp at a time until it becomes a smooth & creamy sauce. 

To assemble: 

Feel free to add in any extra veggies or whatever you have at home to make it your own! It helps to have your rice & lentils already prepared to make this dish super quick. If you have these items prepped you can whip it up in under 10 mins! 

I like to arrange mine all pretty but you can literally just toss everything in a bowl, drizzle some Cilantro Lime sauce on top and dig in! 

Pairs perfectly with tortilla chips & my Blood Moon Margarita!  

Mediterranean Flatbread

IMG_9152.jpeg

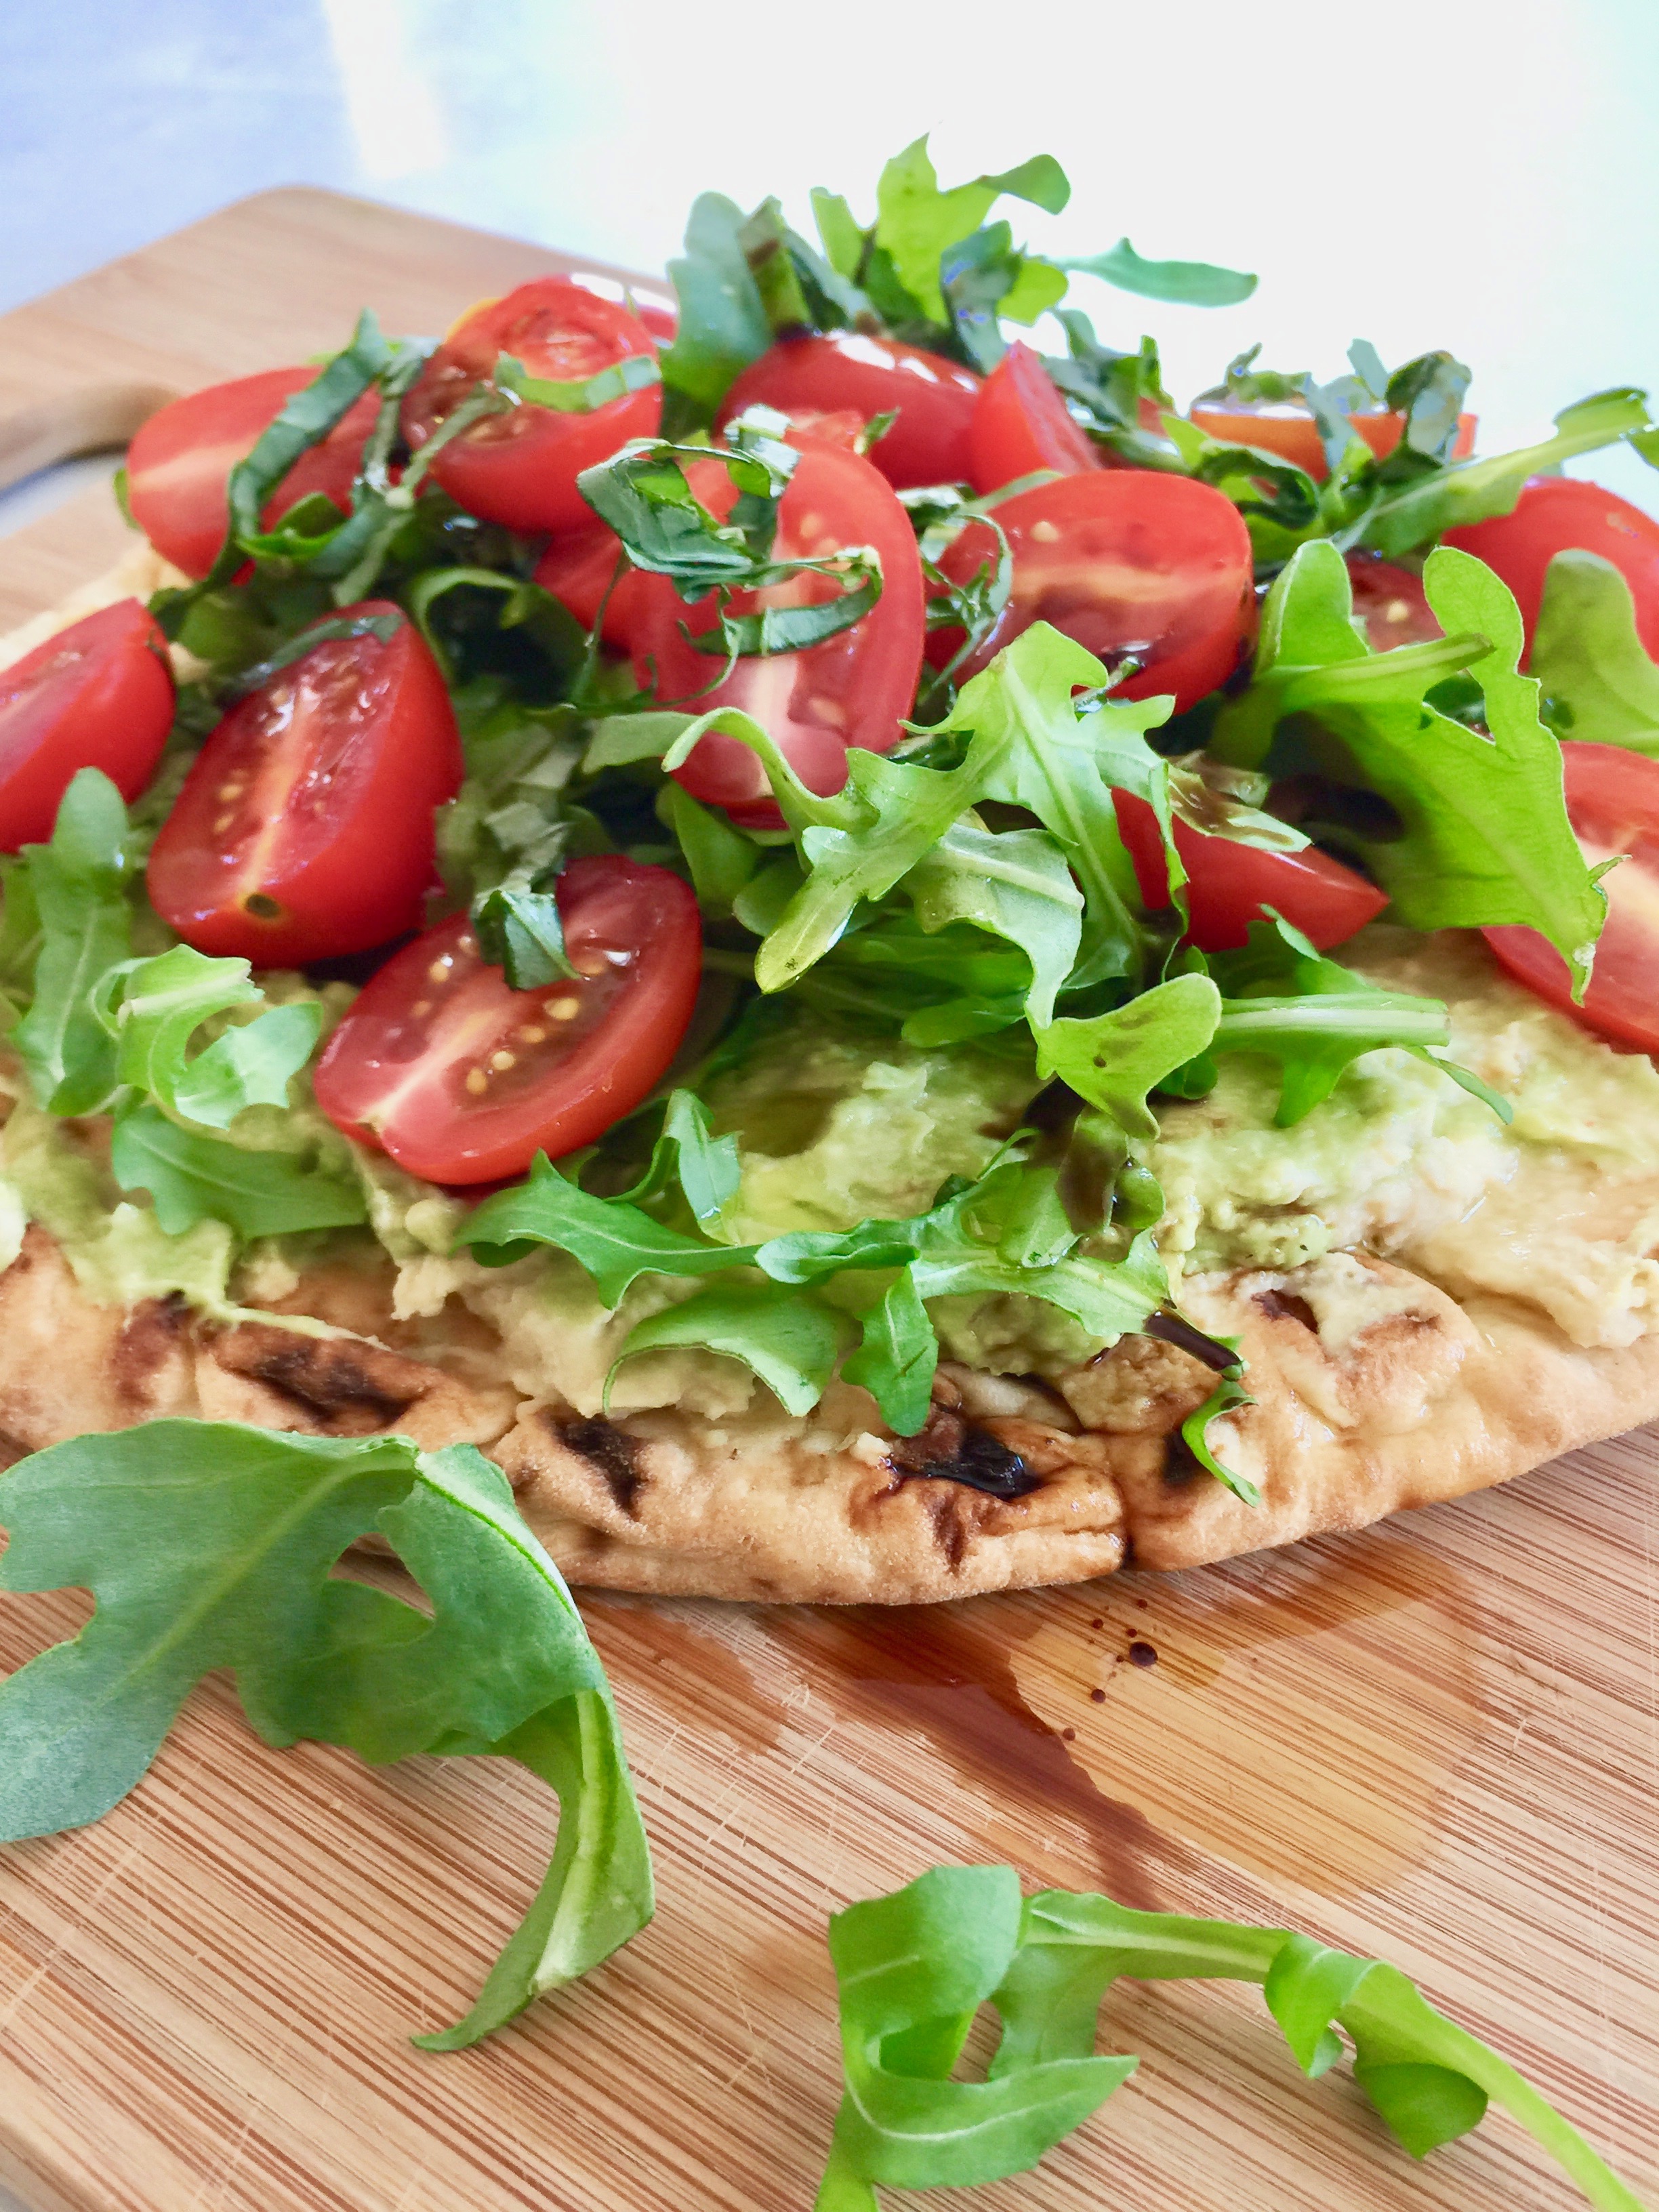
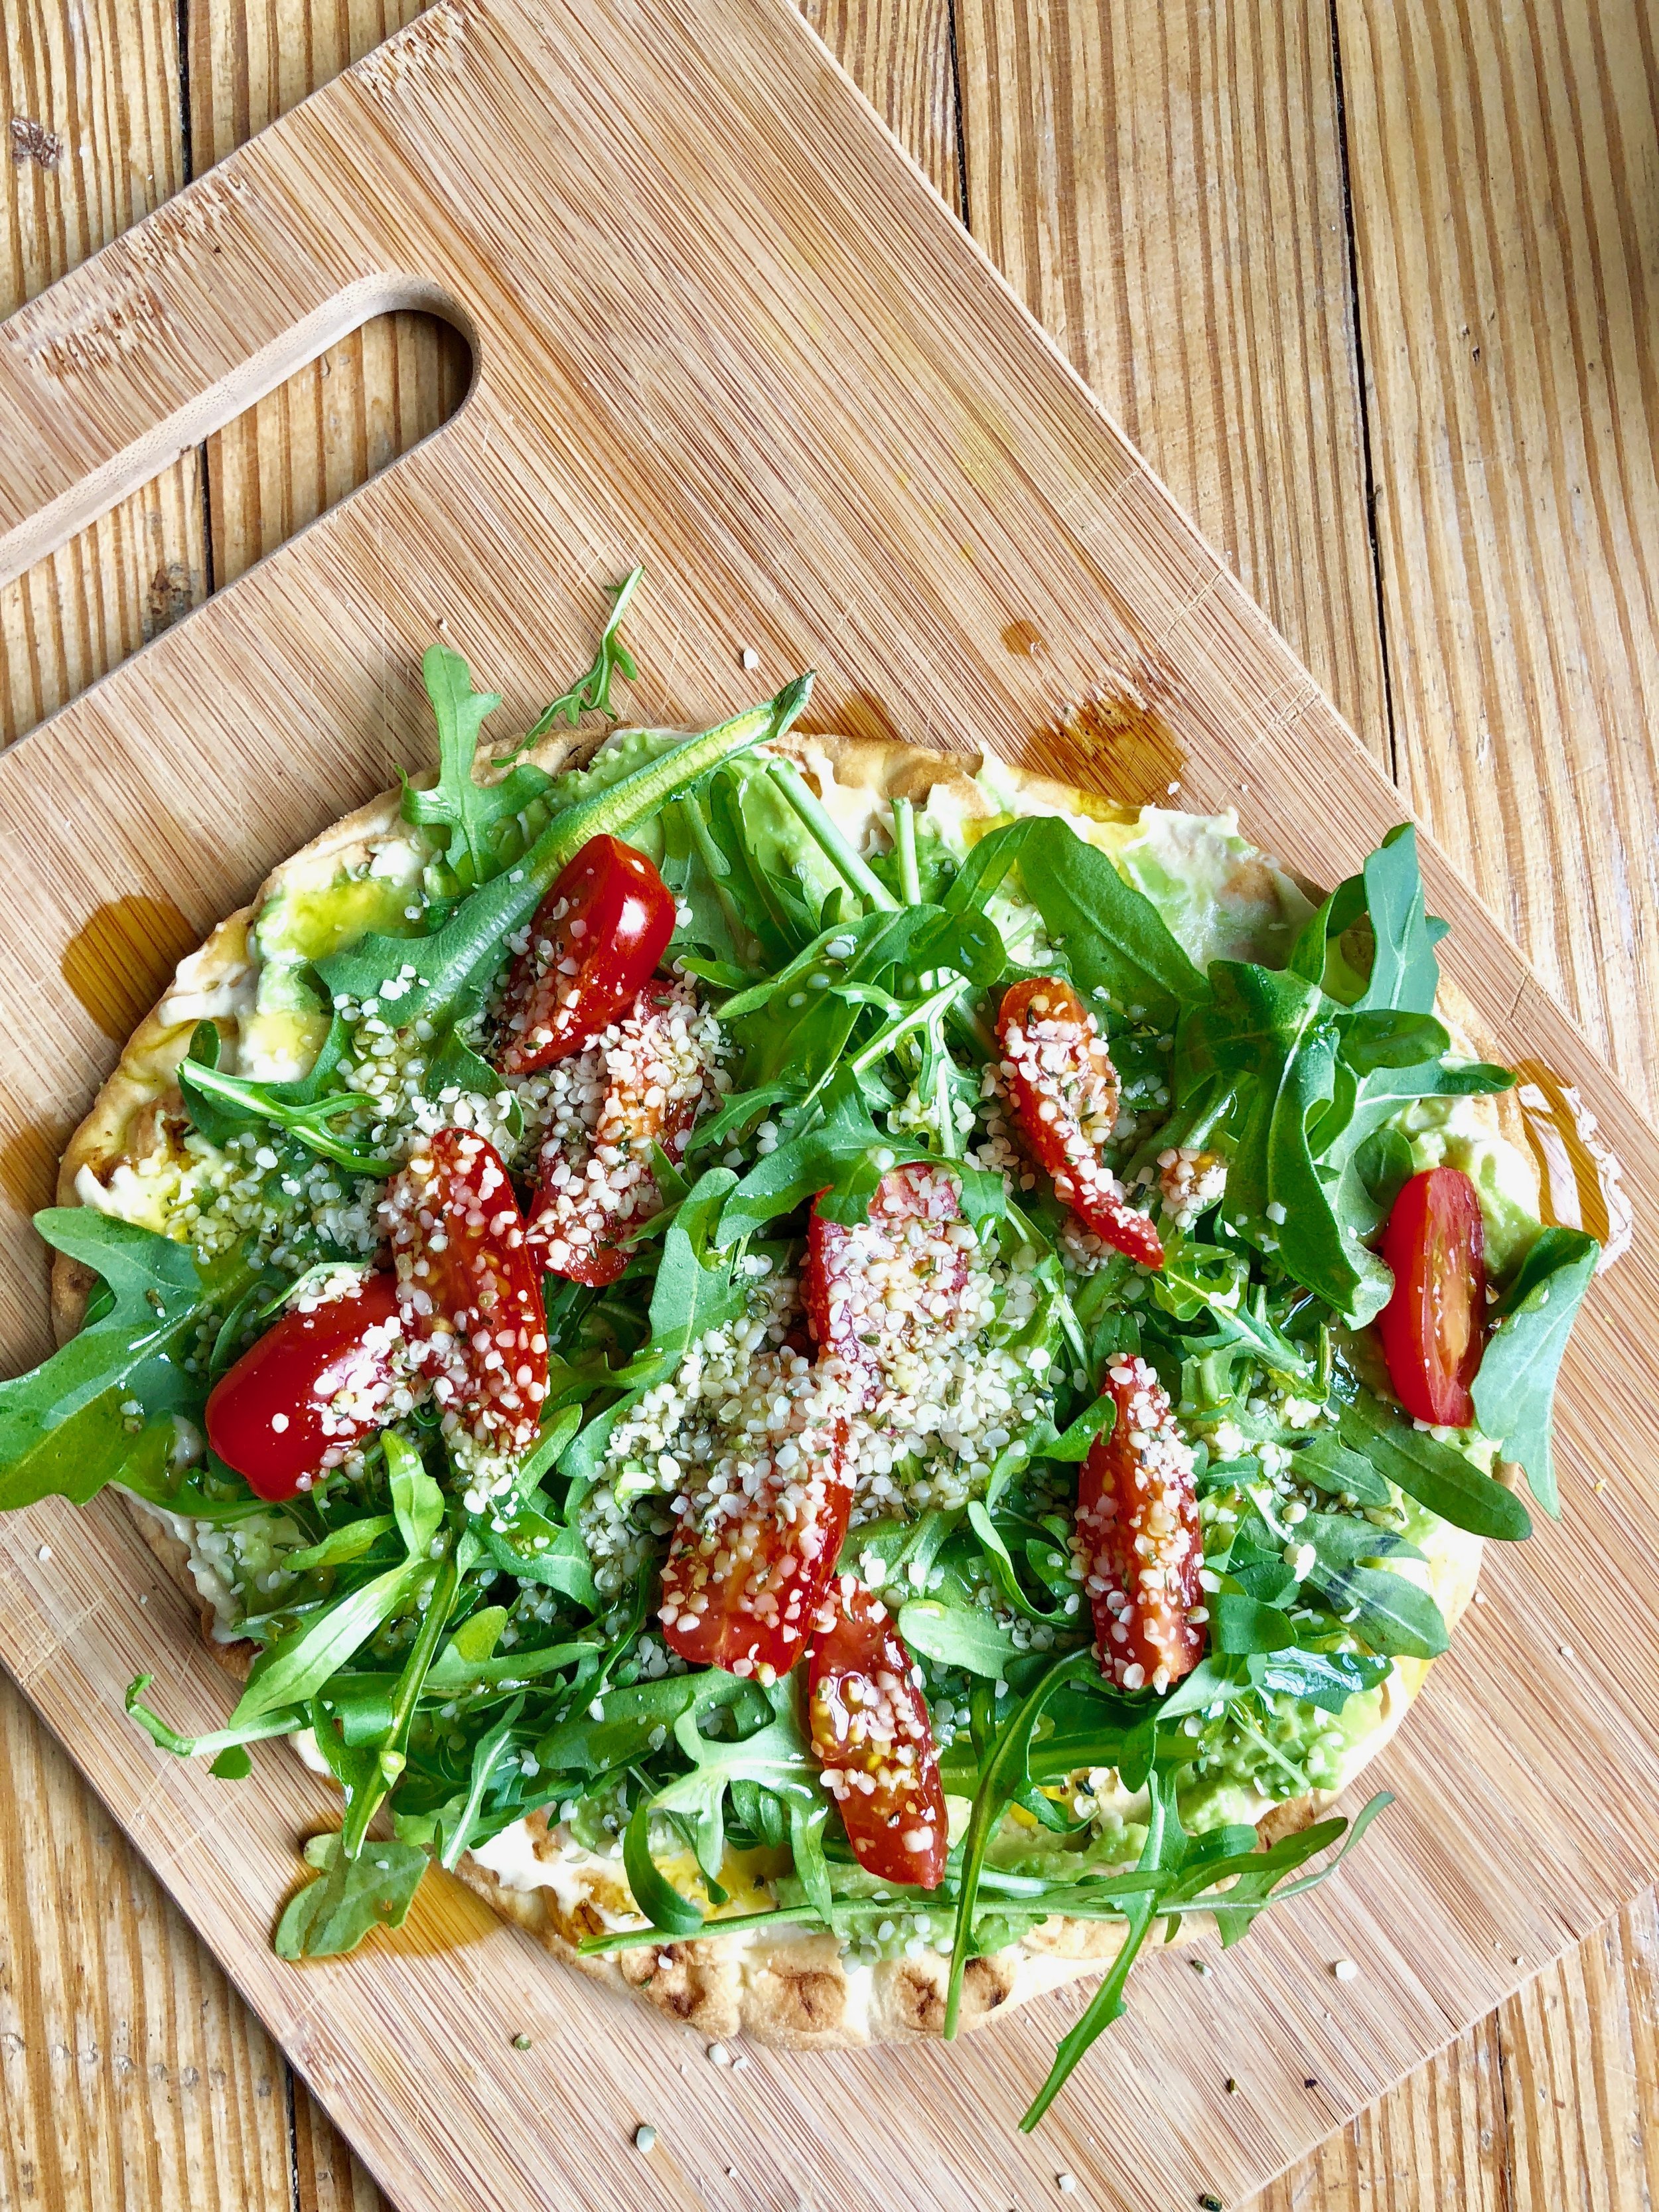
This is an extremely versatile and super simple yet delicious flatbread. You can whip it up for a quick lunch or dinner or even serve as an appetizer. This has become a weekly staple in our house and I love it because you can switch up the flavors and ingredients. My favorite to make has a Mediterranean vibe - toasted naan, a layer of my Simple Homemade Hummus, topped with a layer of smashed avocado, arugula, sliced cherry tomatoes & fresh basil. It's then finished with extra virgin olive oil, balsamic vinegar & hemp hearts. I love all the different textures and bright flavors it provides. The creaminess of the hummus & avocado combined with the crunch of the toasted naan & hemp hearts is just so perfect. Light & fresh but still fills you up!

Ingredients:

IMG_9122.jpeg

Serves 1-2

1 piece Naan 

1/4 cup Hummus

1 large or 2 small ripe avocado- smashed

1 cup arugula 

1/2 cup cherry tomatoes, sliced in half

1-2 Tbsp fresh basil, chopped 

1 Tbsp raw shelled hemp seed (hemp hearts)

Drizzle of extra virgin olive oil & balsamic vinegar 


Directions: 

IMG_9123.jpeg

Preheat oven to 400 degrees. 

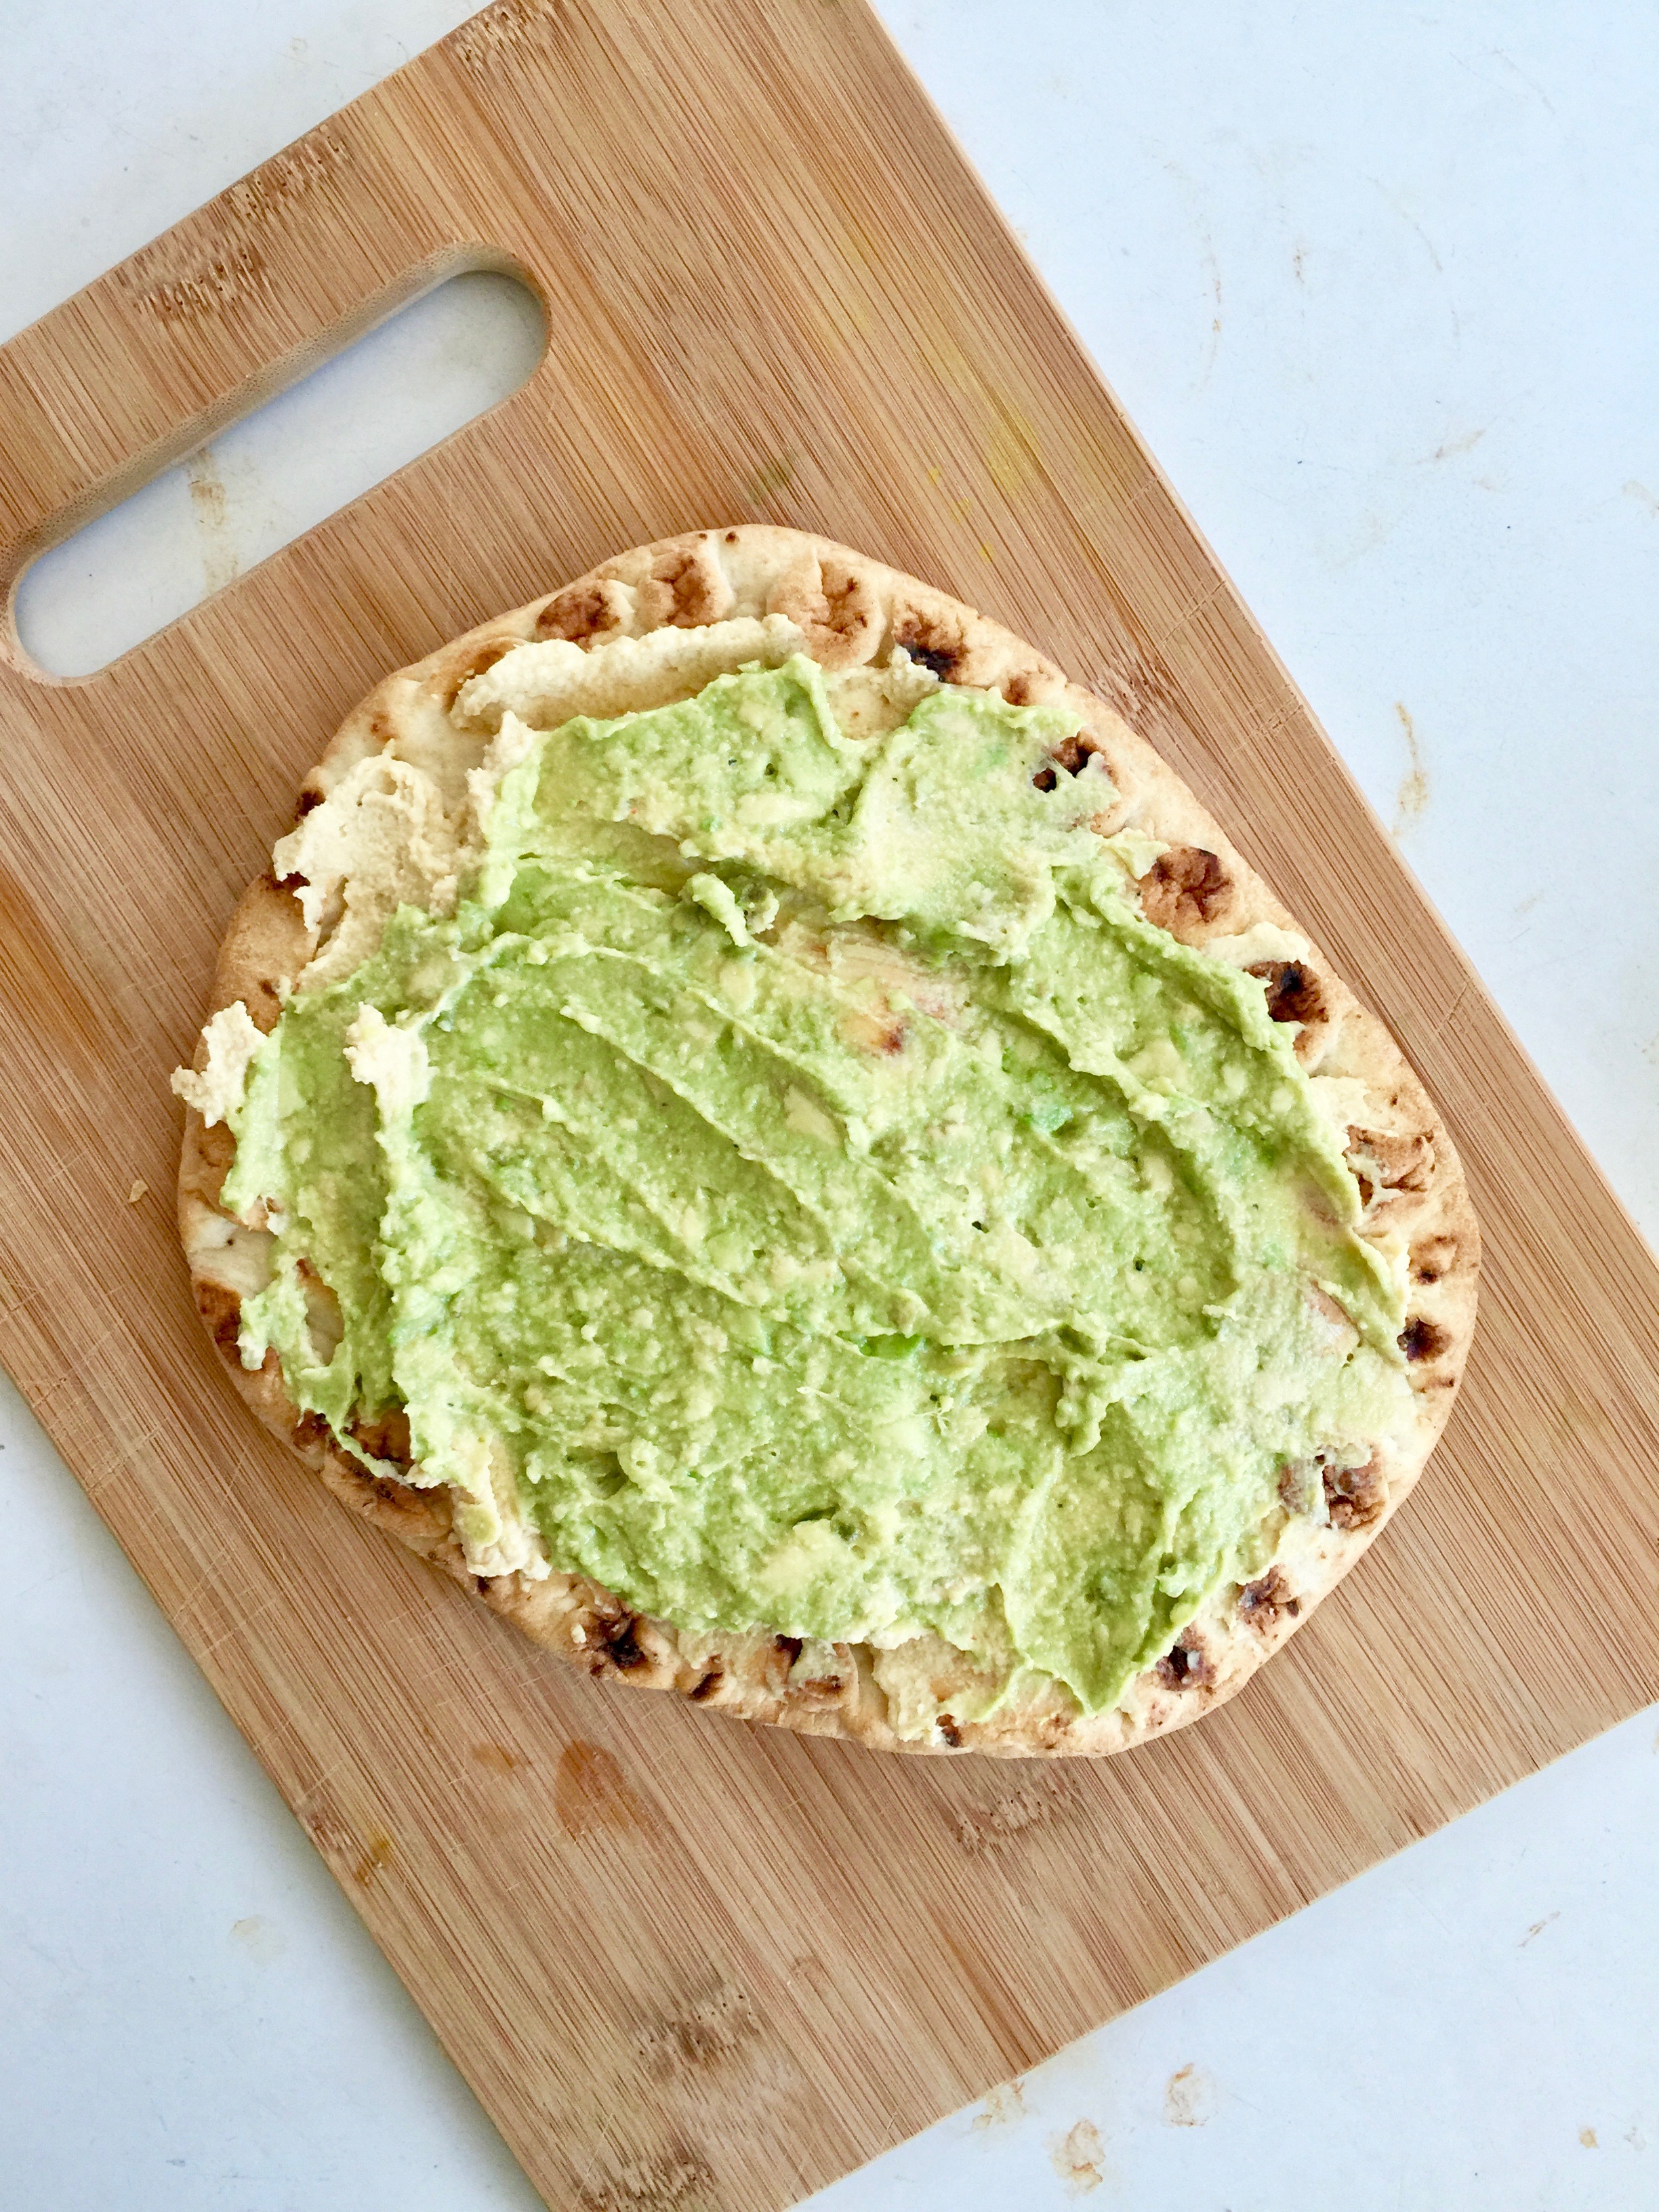
Prep your toppings and set aside. Place the naan directly on the top of rack and bake until golden brown, about 8-10 minutes. Remove from oven and place onto a cutting board or baking sheet. Using a spatula spread on a layer of hummus and then top with the smashed avocado and spread evenly. Next, add the arugula, sliced cherry tomatoes, fresh basil & hemp hearts. Finish off by adding a healthy drizzle of extra virgin olive oil & balsamic vinegar. Cut into 4 pieces & enjoy! 

The perfect quick bite or dinner in a pinch! 

IMG_0217.jpeg

Ella's Spinach Banana Muffins

FullSizeRender-10 2.jpg

These spinach + banana + blueberry muffins are seriously good and are Ella's favorite! I know you're probably thinking, why would you put spinach in muffins? Well, why not?! Spinach is a mega super food full of all the good stuff you need & want for your kids (and yourself). I make these weekly in my household, in fact I made a batch yesterday (15) and there is ONLY 1 left! (I did share with family, but still.) They are THAT good and good for you, I mean it when I say they're guilt free. I don't have to feel bad if I give Ella more than 1!

They are vegan, can be made gluten free, & only have 3 tiny teaspoons of raw sugar, the bananas provide the rest with their natural sweetness. They are perfect for breakfast or a mid-day snack and are so simple to make!

I love to spread a little almond or cashew butter on top, as Ella would say, "mmmm!" #EatGreenThings

Ingredients:

FullSizeRender-12 2.jpg

Makes 12-15

1 cup Almond flour 

3/4 cup All purpose flour

* to make gluten free use 1 cup ground oats + 1 cup almond flour or 2 cups ground oats* 

1/4 cup Ground flax

2 tsp Baking powder 

1/2 tsp Baking soda

1/2 tsp Salt

IMG_8996.JPG

3 tsp Raw Sugar

1 tsp Cinnamon

---

2 heaping cups of Spinach

1/2 cup Soy milk or unsweetened almond milk 

3  Bananas, very ripe

1/4 cup Coconut oil

2 Tbsp unsweetened apple sauce 

1/2 cup fresh or frozen blueberries (I like the frozen wild blueberries from Trader Joe's bc they're mini!) 

Directions:

Preheat oven to 350 degrees. Prepare you muffin/cupcake pan by lining with cupcake liners or spray with pan spray. 

In a food processor (I love my Ninja) puree the spinach and dairy free milk. Add the bananas & coconut oil and blend until smooth. 

In a medium mixing bowl whisk together the dry ingredients. Pour the spinach/banana mixture + apple sauce into the dry ingredients and mix until there are no lumps. Add the berries into the batter and stir a few strokes to incorporate the berries, do not over mix! Using a medium ice cream scoop  (with trigger) or a spoon, divide batter among 12-15 muffin tins. Bake at 350 degrees for approximately 25 minutes until the tops are slightly golden and springs back when touched. It's hard to do but try to wait until they are completely cooled before you dig in so the texture has time to develop!

Hope you like them as much as Ella & my family does!! 

Gosh, I just love her tiny little hand! She's ready to dig in! &nbsp;

Gosh, I just love her tiny little hand! She's ready to dig in!  

Blood Moon Margarita

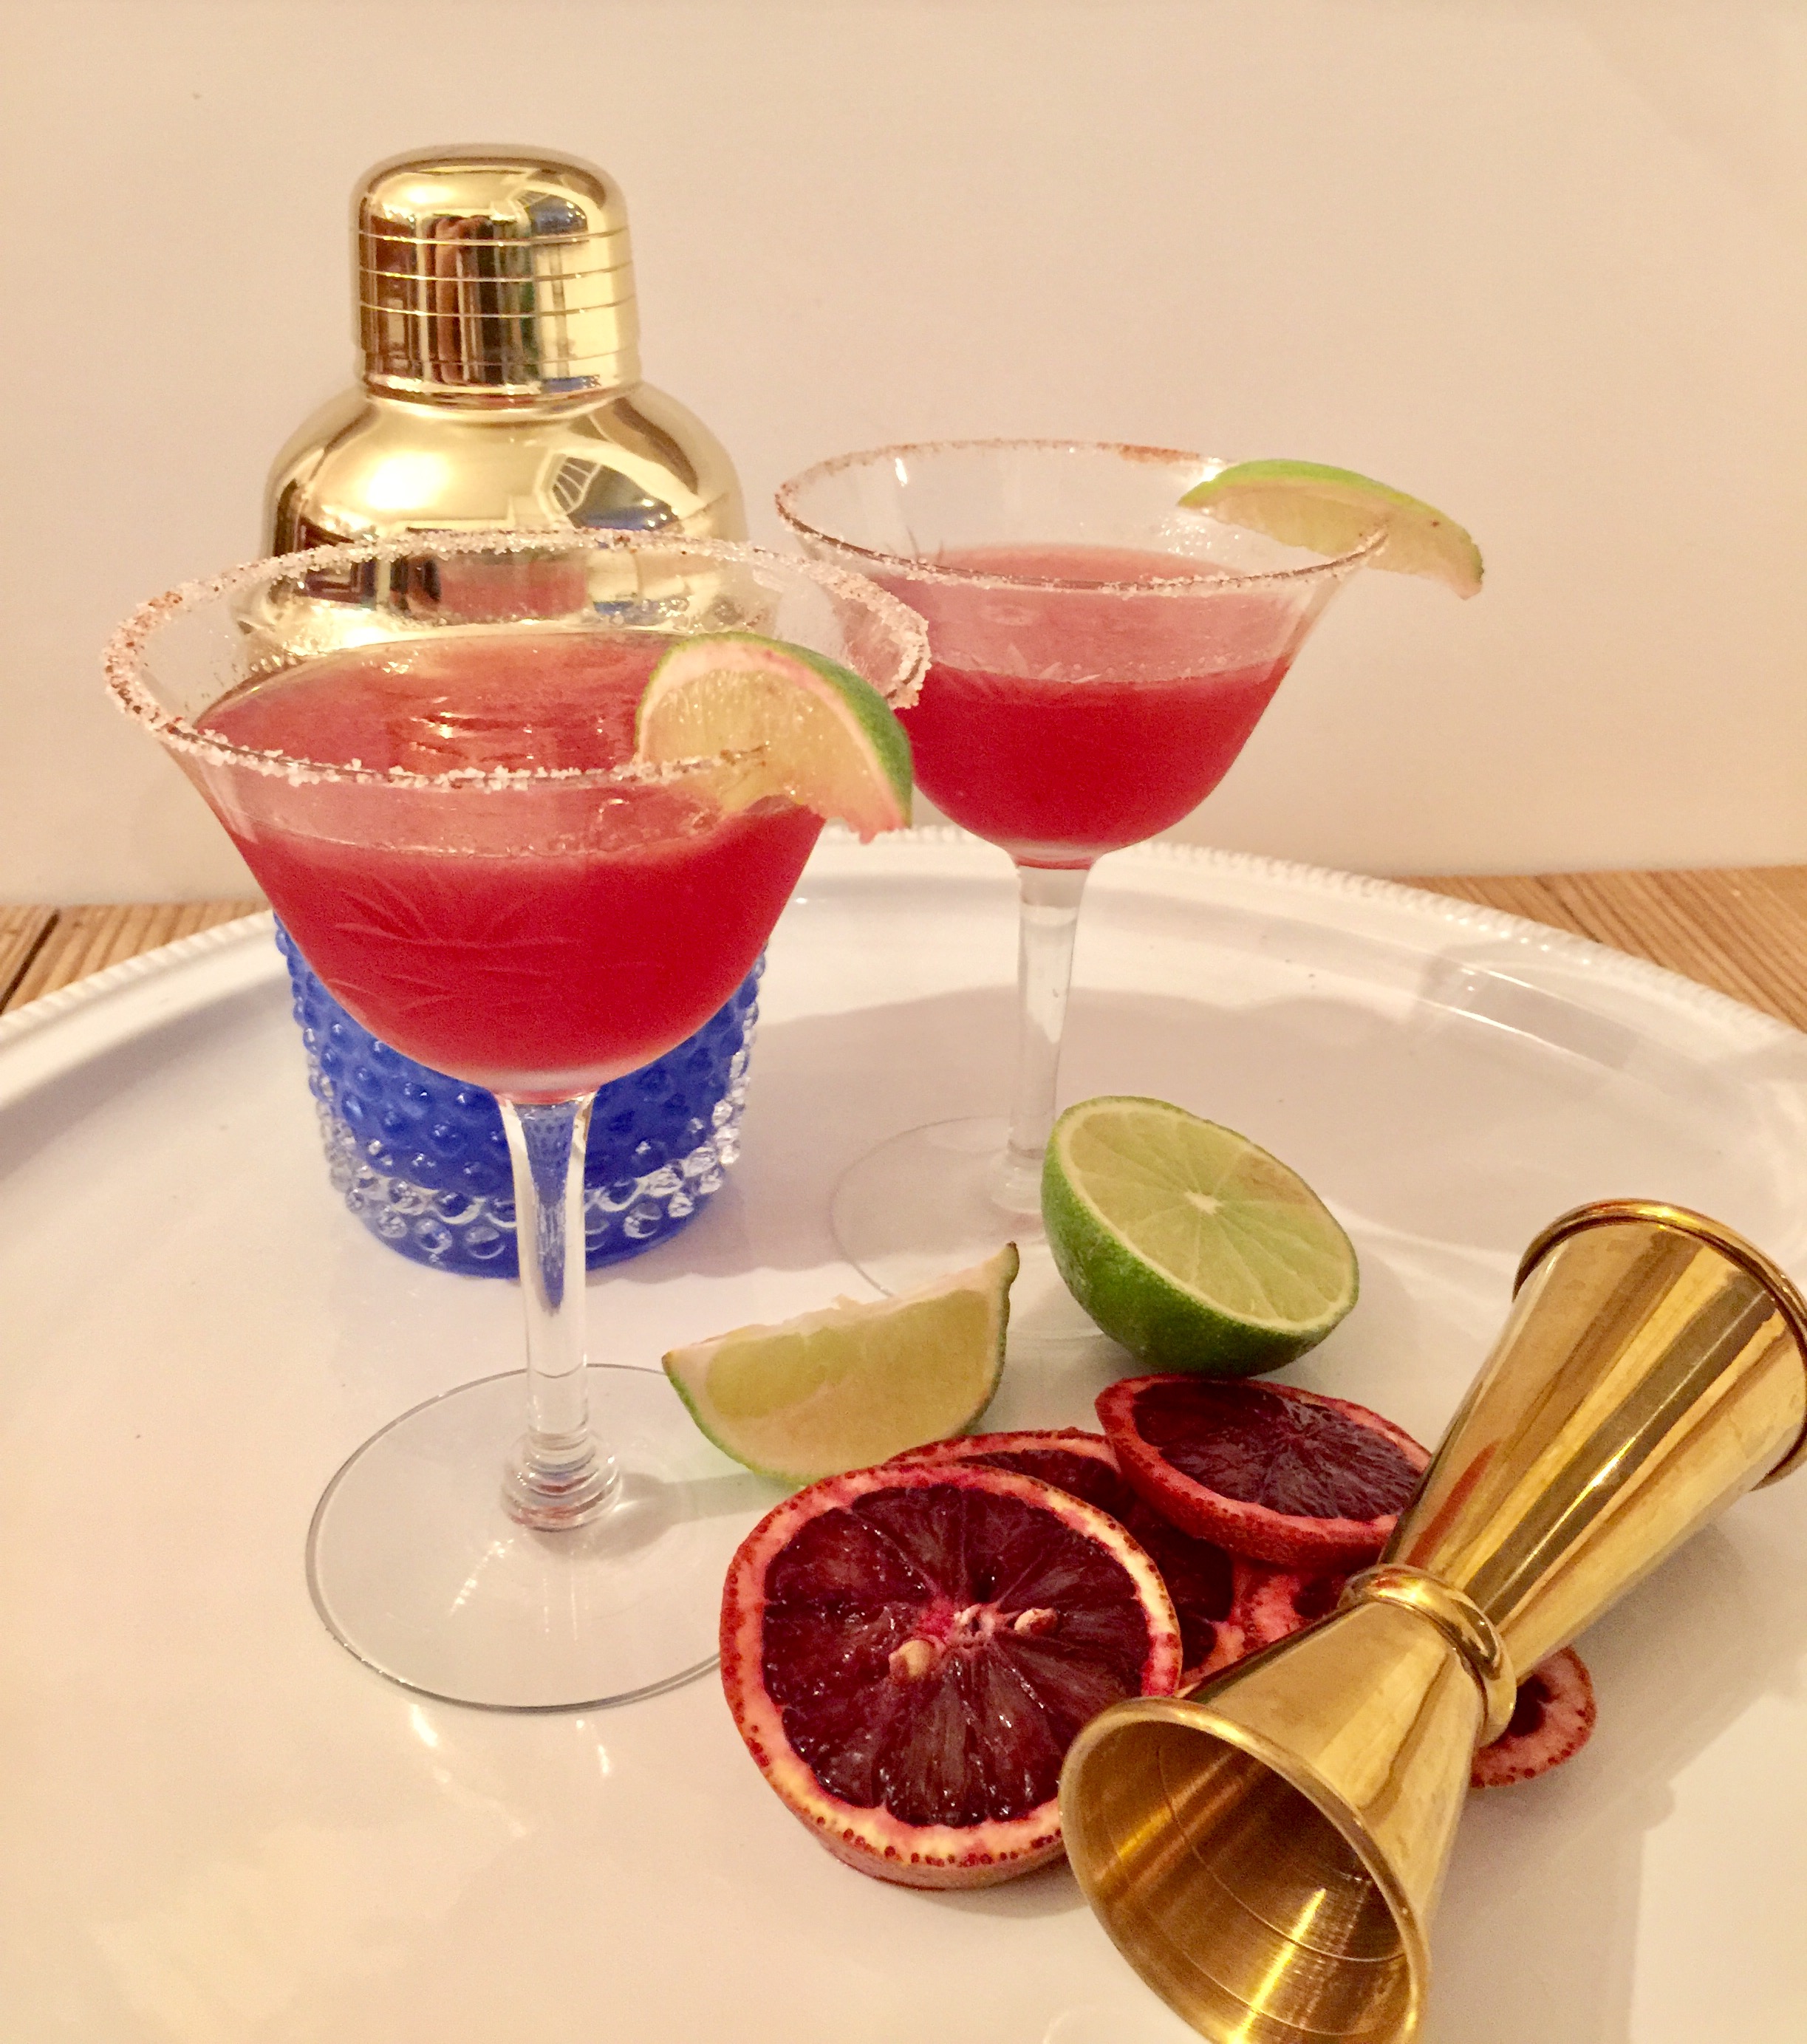
With the weather getting warmer and the sun starting to shine it gets me in the mood for summer. I crave all things citrus this time of year and blood oranges are one of my favorites. This is a perfect winter margarita because blood oranges are now in season but won’t be around for long so go get yours quick! Since I am not a fan of overly sweet drinks, I love using fresh squeezed juice. You will be throwing your sweet and sour mix out the window! 

Blood oranges have a fun vibrant color and a wonderfully sweet & tangy flavor which creates a unique, refreshing and oh so good marg. One sip & you’ll feel like your wastin’ away again in Margaritaville

Pair it with my Lentil Tacos for the perfect Taco Tuesday meal! 

FullSizeRender-4 2.jpg

Blood Moon Margarita

Serving size: 2 cocktail margs

2 oz Tequila, a nice and smooth tequila that is, get the good stuff- you wont regret it! 

1 oz Triple Sec, Cointreau, or Grand Marnier - don't skimp here either. The cheaper you get the more sugary/syrupy it will be. 

1/2 a medium sized lime, save other 1/2 for garnish 

1 medium sized blood orange

Sweet/Spicy Rim

1 tsp Sugar 

1 tsp Salt

1/4-1/2 tsp Paprika 

On a small plate mix the sugar, salt & paprika. Wet the rim of 2 stemmed cocktail or margarita glasses by running a lime wedge along the rim. Dip/roll the rim into the sugar/salt/paprika mixture. This will add a little pizzaz to the drink & presentation. 

Next, squeeze the juice from the blood orange and 1/2 of the lime into a cocktail shaker. (I love using my citrus press, less mess & ensures you get all of the juice!) Add in the tequila & triple sec and top with ice. Now, shake it like a salt shaker! Strain into your 2 glasses & garnish with a thin slice of lime.

FullSizeRender-6 3.jpg

Lentil Tacos

It's Tuesday so that means we're having tacos for dinner! There's something about Taco Tuesday that makes you feel like it's the weekend. And we all know we need that feeling during the week! So pull out the chips & salsa, mix up some of my Blood Moon Margarita's & let's celebrate the day.

Lentils are a must have in my pantry. Ella loves them plain, but I love to add them to soups, salads, burrito bowls and tacos! The first time I had green lentils from Trader Joe's I was like dang these would make the perfect vegan "taco meat." They have a nutty, hearty flavor & their small size gives just the right texture for a taco. Packed with protein, iron & naturally gluten free lentils are a great addition to many meals! 

Lentil Tacos

Serves 4-6

Let's start by preparing the lentils. This can totally be done ahead of time and can be kept in your fridge for up to a week! 

FullSizeRender-7.jpg

1 cup green lentils 

2 1/4 cups Vegetable broth (or water) 

In a medium sauce pan bring contents to a boil. Reduce heat to low and simmer with the lid on until lentils are tender and most of the liquid is absorbed, approx 30-40 minutes. 

This will make a decent amount so I like to leave them plain and serve with their natural flavor so I can use the leftovers in various ways the rest of the week. 

Next we will make some seasoned beans, this is where the taco spices come in. Feel free to use a taco seasoning packet or make your own! You can also sauté some onions before you add the beans to the skillet. Do your thing! 

2 cans of beans, I like to use 1 can pinto, 1 can black beans or white beans. But you can mix it up! 

2-4 tsp Chili Powder (depends on how spicy you like it!)

1/2 tsp Chipotle powder 

1/2 tsp Paprika 

1/2 tsp Cumin

1/2 tsp Salt

1/2 tsp Pepper

2 Tbsp Vegetable broth or water 

Drain the liquid from both cans of beans, but do not strain. Add seasoning and heat on medium-low heat for 10-15 minutes. Add broth or water and stir to make it a little saucy. 

Time for the toppings. This is where you can have fun with it and chop up whatever you want! I decided to use the following:

IMG_8918.JPG

1 cup chopped spinach 

2 avocados, diced

1 red pepper, diced

3 green onion, sliced

1 cup cherry tomatoes, diced


I used soft Whole Wheat Tortilla's for my shell. But you can use hard shells, turn it into a taco salad or a burrito bowl with some rice! 

To assemble

Heat up your tortilla shell on a skillet or place in the microwave for 20 seconds. Scoop on some lentils and beans & top with your toppings of choice. This is such a simple and healthy dish! You definitley won't feel guilty going back for seconds...or thirds!  


Vieux Carré

A Vieux Carré is a smart, fun & sophisticated cocktail. The kind of drink you want to mix up when you're trying to impress. Drink with class, this is one to sip with your pinky up. Oh, you fancy huh? 

FullSizeRender-12.jpg

Serving size: 1 stiff cocktail or 2 little tasters 

1 tsp Bénédictine (a delightful french herbal liqueur) 

3/4 ounce Rye Whiskey

1/2 ounce Cognac, as Busta Rhymes would say "pass the Courvoisier"

1/2 ounce Sweet Vermouth 

Dash of Peychaud's bitters

Dash of Angostura bitters 

Lemon twist 

Combine all liquid ingredients into a mixing glass, fill with ice & stir well. Strain into an old fashioned cocktail glass, trace the rim with a lemon peel and use for garnish. 

à votre santé!


Root Vegetable Tagine

All my St. Louis friends, if you haven’t been to OLIO in Tower Grove, please do yourself a favor and go! It is the perfect spot for a date or night out with your friends and their Israeli cuisine, cocktails and atmosphere are unlike any other. My spiced up Simple Homemade Hummus topped with paprika, fresh herbs, tahini & olive oil is inspired by their King of Kings Hummus - by far the best hummus I’ve ever had. Another one of my favorites from OLIO is the Root Vegetable Tagine. Aromatic, creamy & so delish. This recipe may seem like it has a lot of different ingredients, so feel free to explore different root veggies and if you don’t have all of these spices feel free to use what you have. But I highly recommend incorporating these spices into your spice cabinet! Tagines are traditionally cooked in earthenware pots but I developed this recipe with simplicity in mind for cooking in any kitchen. 

So open up a bottle of wine, put on some Leon Bridges and let’s get cooking! 


Roasted Root Vegetables

FullSizeRender-5.jpg

Serves 2-4

2 medium/large sweet potatoes, diced (I like to keep the skin on, but up to you!)

2 medium beets, peeled & diced (2 red or 1 red & 1 golden)

2-3 carrots, peeled & diced (purple & yellow carrots are fun to add too! 

2 medium parsnips, peeled & diced 

1/2 Tbsp fresh mint, chopped 

1/2 Tbsp fresh dill, chopped 

1/2 Tbs fresh parsley, chopped 

1/2-1 tsp cumin

1/2-1 tsp curry powder 

1/2-1 tsp tumeric 

1/4 tsp paprika

1/4 tsp groung nutmeg 

1/4 tsp cinnamon 

1/2-1 tsp salt 

1/2-1 tsp pepper 

2-3 Tbsp Extra virgin olive oil

Preheat oven to 400 degrees. 

Scrub your root veggies clean, peel & cut into approximately 1/2 inch cubes. Place into a large mixing bowl and add the olive oil. In a separate small bowl combine all of your spices/herbs and stir. You can add a bit more or less spice, remember this is your dish, do your thing! Sprinkle the spice mixture over the root veggies & toss to coat. Make sure each cube is glistening & spiced. 

Pour onto a parchment lined baking sheet and spread out evenly.

Roast for approximately 45 minutes, stirring every 15 minutes. Crank up the heat to 425 degrees for shorter cook time. Your house is going to smell amazing by the way. The veggies are done once tender, golden, slightly crisp, & caramelized. 

Creamy Basmati Rice

While your veggies are roasting you can prepare the rice. This rice is super creamy and the perfect complement to this dish. I like to use Lundberg California White Basmati Rice from Whole Foods, either white or brown. But any rice will do! 

1 cup white basmati rice (brown works too but will take longer to cook!)

1 1/2 cup vegetable broth or water 

1/2- 1 cup of unsweetened almond milk

1/4-1/2 tsp curry

1/4-1/2 tsp turmeric 

pinch of salt

In a medium sauce pan combine rice, water or broth (broth adds more flavor!) in a pot and bring to a boil. Cover with a lid and let simmer on low for 15 minutes. Turn off heat, keep the lid on and let steam for 10 minutes. (May take longer depending on brand) Fluff with fork. Next, turn heat back on low and add in 1/2 cup of almond milk, spices & salt. Stir to combine. I like mine extra creamy so add in more almond milk as desired. 

On a large plate, create a bed of rice and top with the roasted root veggies and some chopped fresh herbs. Pour yourself another glass of wine and get ready to ignite your taste buds. This is one of those feel good meals. 

Please let me know what you think and if you share on Insta tag me @madebylia & #madesimple. 


FullSizeRender-4.jpg

Arugula Farro Salad

I don't know about you but I never heard of farro growing up. Honestly I never even tasted it until about a year ago. But I totally love it & it has become a must have in my pantry! Not only is it super versatile but it is packed with tons of of good stuff and is high in protein. It goes with so many different flavors and is the perfect way to spruce up a salad. This Arugula Farro Salad is unique with a layer of my Simple Homemade Hummus at the bottom which provides an amazing creaminess and texture to the salad. Then I top it with farro, arugula, dill & ready to eat baby beets. So fresh and so clean clean. 

Ingredients needed: 

Serves 2

1/2 cup of cooked farro

1/2 cup of homemade hummus 

2 cups arugula 

4 pre cooked baby beets, diced (I love the ones from Trader Joes) 

1 Tbsp Extra virgin olive oil

1 tsp Red wine vinegar 

Juice from 1/2 a lemon

2 tsp chopped fresh dill, plus a few sprigs for garnish

1/4 tsp tumeric powder

pinch of salt & pepper


FullSizeRender-7.jpg

For the farro:

This can totally be made ahead of time, I like to double the batch and make extra so I can use it throughout the week! That’s about as far as I get into meal prepping. 

1/2 cup farro (I use Trader Joe's brand) 

1 cup water or veggie broth

In a medium sauce pan combine farro and water or broth and bring to a boil over high heat. Reduce heat to low, cover and simmer for 10 minutes. Remove from heat and let set for 5 minutes. Fluff with fork. Set aside. 

So you can either make your own hummus (highly recommended) this can be made ahead too and stored in your fridge for several days! Or you can use store bought but homemade is the way to go if you have time! Head over to my blog post Simple Homemade Hummus for the recipe! 

Okay, now lets assemble! 

In a medium/large mixing bowl combine the arugula, farro, diced beets, olive oil, red wine vinegar, lemon juice, turmeric, dill, salt & pepper. Toss together making sure everything is coated & glistening. 

In a salad bowl, spread 1/4 cup of hummus at the base of each bowl and top with the farro and arugula salad mixture. Add a few sprigs of dill for garnish. Dilly Dilly! 

Simple Homemade Hummus

Oh how I love me some hummus. Every time I make it from scratch I'm like why don't I make this all the time?! It's ridiculous how simple it is to whip up. Have it as a simple snack with pita, spread it on a veggie sandwich or try it with my Arugula Farro Salad

Ingredients:

FullSizeRender-3.jpg

1 can of chickpeas 

1-2 Tbsp of tahini (not totally necessary but I just love the flavor it adds) 

Juice from 1/2 a lemon 

3 Tbsp olive oil 

1/4 tsp of paprika 

pinch of salt 

2 -4 Tbsp water

Empty the contents from a can of chickpeas into a microwave safe bowl and cook for 3 minutes. Strain the liquid and place the chickpeas into a food processor. (Please go treat your self and buy one of these if you don’t already have one!! They are so useful, I love my Ninja and use it daily!)

Add the tahini, lemon juice, paprika & salt and blend on high. It will be thick and chunky but dont worry we’re about to smooth it out. Scrape down the sides and slowly drizzle in the olive oil while it is blending (if yours has a little opening, if not then add in 1 Tbsp at a time.) Next, add in the water 1 Tbsp at a time until you reach the consistency of your liking. Blend on high for 2-3 minutes until smooth. Feel free to keep a little chunky for extra texture! 

I love to serve mine with olive oil, fresh herbs, paprika & tahini, yum! 

This can be stored in an airtight container in the fridge for up to a week. 


FullSizeRender-19 2.jpg

Sweet Potato Fries with Tahini Mustard Sauce


These fries are killer - seriously next level! Such a simple item, perfect for a side dish, snack or just for the heck of it. They have that extra somethin' somethin' that rejuvenates your love for sweet potatoes. And if you eat as many sweet potatoes as I, you sometimes need to rekindle the flame. 

FullSizeRender-6.jpg

For the fries:

Serves 2-4

3 medium/large sweet potatoes

2 Tbsp olive oil 

1/2 tsp salt

1/2 tsp pepper

1/2 tsp paprika

Preheat oven to 425 degrees. 

Slice sweet potatoes into thin strips and place into a medium bowl. Add olive oil, salt & pepper, and paprika. Toss to coat, making sure each potato is glistening.  Transfer to a parchment lined baking sheet and spread them out so lay flat. Roast for 20-30 minutes until crisp & caramelized. 

Tahini Mustard Sauce:

2 Tbsp tahini 

1 tsp yellow mustard (dijon works too!)

1 tsp whole grain mustard 

1 tsp ground mustard (not 100% necessary, if you don’t have it just add more mustard!)

2 tsp pure maple syrup

pinch of salt & pepper 

2 Tbsp unsweetened almond milk 

In a small bowl whisk together all ingredients until smooth, taste & adjust seasoning to your liking. 

Once sweet potatoes fries are baked, drizzle sauce over top or leave dry & dip the fries into sauce. Yum!

You can actually put this sauce on just about anything. Max put it on his salmon & loved it! 


Cashew Cream Sauce

I haven't been this excited about a recipe in a lonnng time. Imagine a cream sauce that is light, silky, creamy & delicious but without the cheese, butter, cream or guilt! You also don't feel like you just ate a brick afterwards. I know what you are thinking, "is there such thing!" or "but can it really be that good?" With much delight I say, YES!!! The first time I tasted it tossed with my favorite pasta, I honestly shed a tear. It is THAT good! I guarantee you will surprise any dairy lover with this recipe.  Make it fresh and toss with your favorite veggies & pasta for a super delicious dinner or keep a jar of it in the fridge for a throw together lunch. My hubby Max & Daughter Ella, love this sauce! Ella is 1 and all she kept saying was "mmmm! and signing "more, more"! 

I hope you enjoy it as much as I do & please share with your friends! Cooking is something to be shared & enjoyed, it shouldn't be something you dread or think you can't do. My job is to help you build a repertoire of fresh, healthy, go to recipes that you can whip up in no time! 

Check out my next blog post for my Capellini Alfredo recipe using this sauce! 

OK now for the recipe...


Ingredients needed:

2 cups unsalted cashews, soaked (4 hrs or 30 mins in super hot water OR microwave for 6 minutes in 3 minute intervals)  

3 Tbsp nutritional yeast

1/4 tsp salt 

1/4 tsp pepper

2 cups unsweetened almond milk

1-2 Tbsp olive oil

To soak cashews place in a medium bowl and fill with warm water until cashews are completely covered. Let soak for about 4-5 hrs or overnight. OR to speed up the process you can soak in super hot water for 30 minutes (Just blend longer!). For an even quicker method, place the cashews in a medium bowl and cover with water. Microwave for 6 minutes for 3 minutes at a time. The soaking of the cashews is super important and is what creates such a smooth & creamy texture. 

FullSizeRender-2.jpg

Once the cashews are soaked, drain the water. Place cashews, nutritional yeast, s&p, and 1 1/2 cups of the almond milk into a food processor. Blend on high speed to combine. Slowly drizzle in olive oil. Blend on high for 2-3 minutes until super smooth and silky. Taste and add more seasoning to your liking. 

Now you can either store in an airtight container and save for up to 2 days or if you are like me and rarely have anything prepared in advance then follow the next few steps. 

Transfer the cashew cream (I saved about 1 cup to store in the fridge) and heat on medium low for 5 minutes. Be sure to whisk frequently so the bottom doesn't burn. Add in the remaining 1/2 cup of almond milk to thin. 

Toss in your favorite pasta & sautéed veggies & there you have it! A super delicious healthy, creamy Vegan Alfredo!

Head over to my next blog post for the Capellini Alfredo recipe which is perfect with this sauce! 


Vegan Capellini Alfredo

Guys, I honestly cried over this dish. It tastes SO much better than the "real" thing, its unreal! Capellini is my favorite pasta because it isn't too heavy & cooks super fast! But please feel free to use your pasta of choice. This dish can also be made gluten free! 


Serves: 2-4

Ingredients Needed:

1 1/2 - 2 cups cashew alfredo sauce (refer to Cashew Cream Sauce for recipe) 

8 -10 oz or roughly half of a 16oz bag of Capellini pasta 

1 cup fresh english peas or frozen peas work just as well

1 cup chopped crimini mushrooms 

1/2 cup vegetable broth 

1 cup chopped aruglua

salt & pepper to taste 

2 Tbsp EVOO (extra virgin olive oil)

optional add ins: 1/4 cup chopped onion, 1 clove minced garlic

FullSizeRender.jpg

Let's do the dang thing. 

In a medium stock pot bring water + 1 teaspoon salt to a boil. 

While your water is coming to a boil, in a medium/large skillet sauté 2 Tbsp olive oil, mushrooms & peas (onion/garlic if desired). Sauté until vegetables are slightly softened but still crisp. Deglaze  the pan with the 1/2 cup of veggie broth. Just let this hang out & simmer on low. 

Once your water has come to a boil, break capellini in half and add to the pot. Stir to ensure the noodles do not stick together. Cook the pasta until al dente, approximately 3 minutes. 

Now this is a super important step! DO NOT I repeat DO NOT ever drain your pasta water. It is an essential ingredient to all pasta sauces. I learned this trick from my girl Lidia on PBS Create and I am forever grateful. It makes me happy to now pass on this secret to you! 

So, using a pasta ladle or small strainer with a handle, scoop out the pasta directly into the skillet with your veggies and broth. Using tongs stir the pasta allowing all the ingredients to mingle. Then add in your cashew alfredo sauce, about 1/4 cup at a time stirring after each addition. Add in the chopped arugula, stir. 

Next, this is where your pasta water comes into play. Start with ladling 2 scoops of the hot pasta water to your pasta. Stir with tongs to make sure all of the noodles are coated with the creamy alfredo. If you like your pasta a bit more saucy, add more pasta water! If you feel it’s too thin then add in more alfredo. And that’s how it’s done! Super creamy, yet light and guilt free capellini & veggie alfredo pasta! So good you will def want seconds!